
 Help Centre
IP Whitelisting
IP Whitelisting
Where can this be found → Admin Panel → Security → IP Whitelist
Roles required to access this feature -> Admin
Overview
The IP Whitelist feature allows administrators to restrict system access to a defined set of trusted IP addresses or CIDR ranges. When enabled, any login attempt from an address not on the whitelist will be denied and logged. There is also an optional bypass setting for SSO-authenticated users.
🛡️ Failsafe: The Default User account always bypasses IP Whitelist restrictions, regardless of the toggle state. This ensures administrators can never be permanently locked out of the system due to a misconfigured whitelist.
Table of Contents
1. Navigate to IP Whitelist
In the left sidebar of the Admin Panel, scroll to the Security section and click IP Whitelist.
The page loads showing the current toggle state (IP Whitelisting disabled) and an empty table.
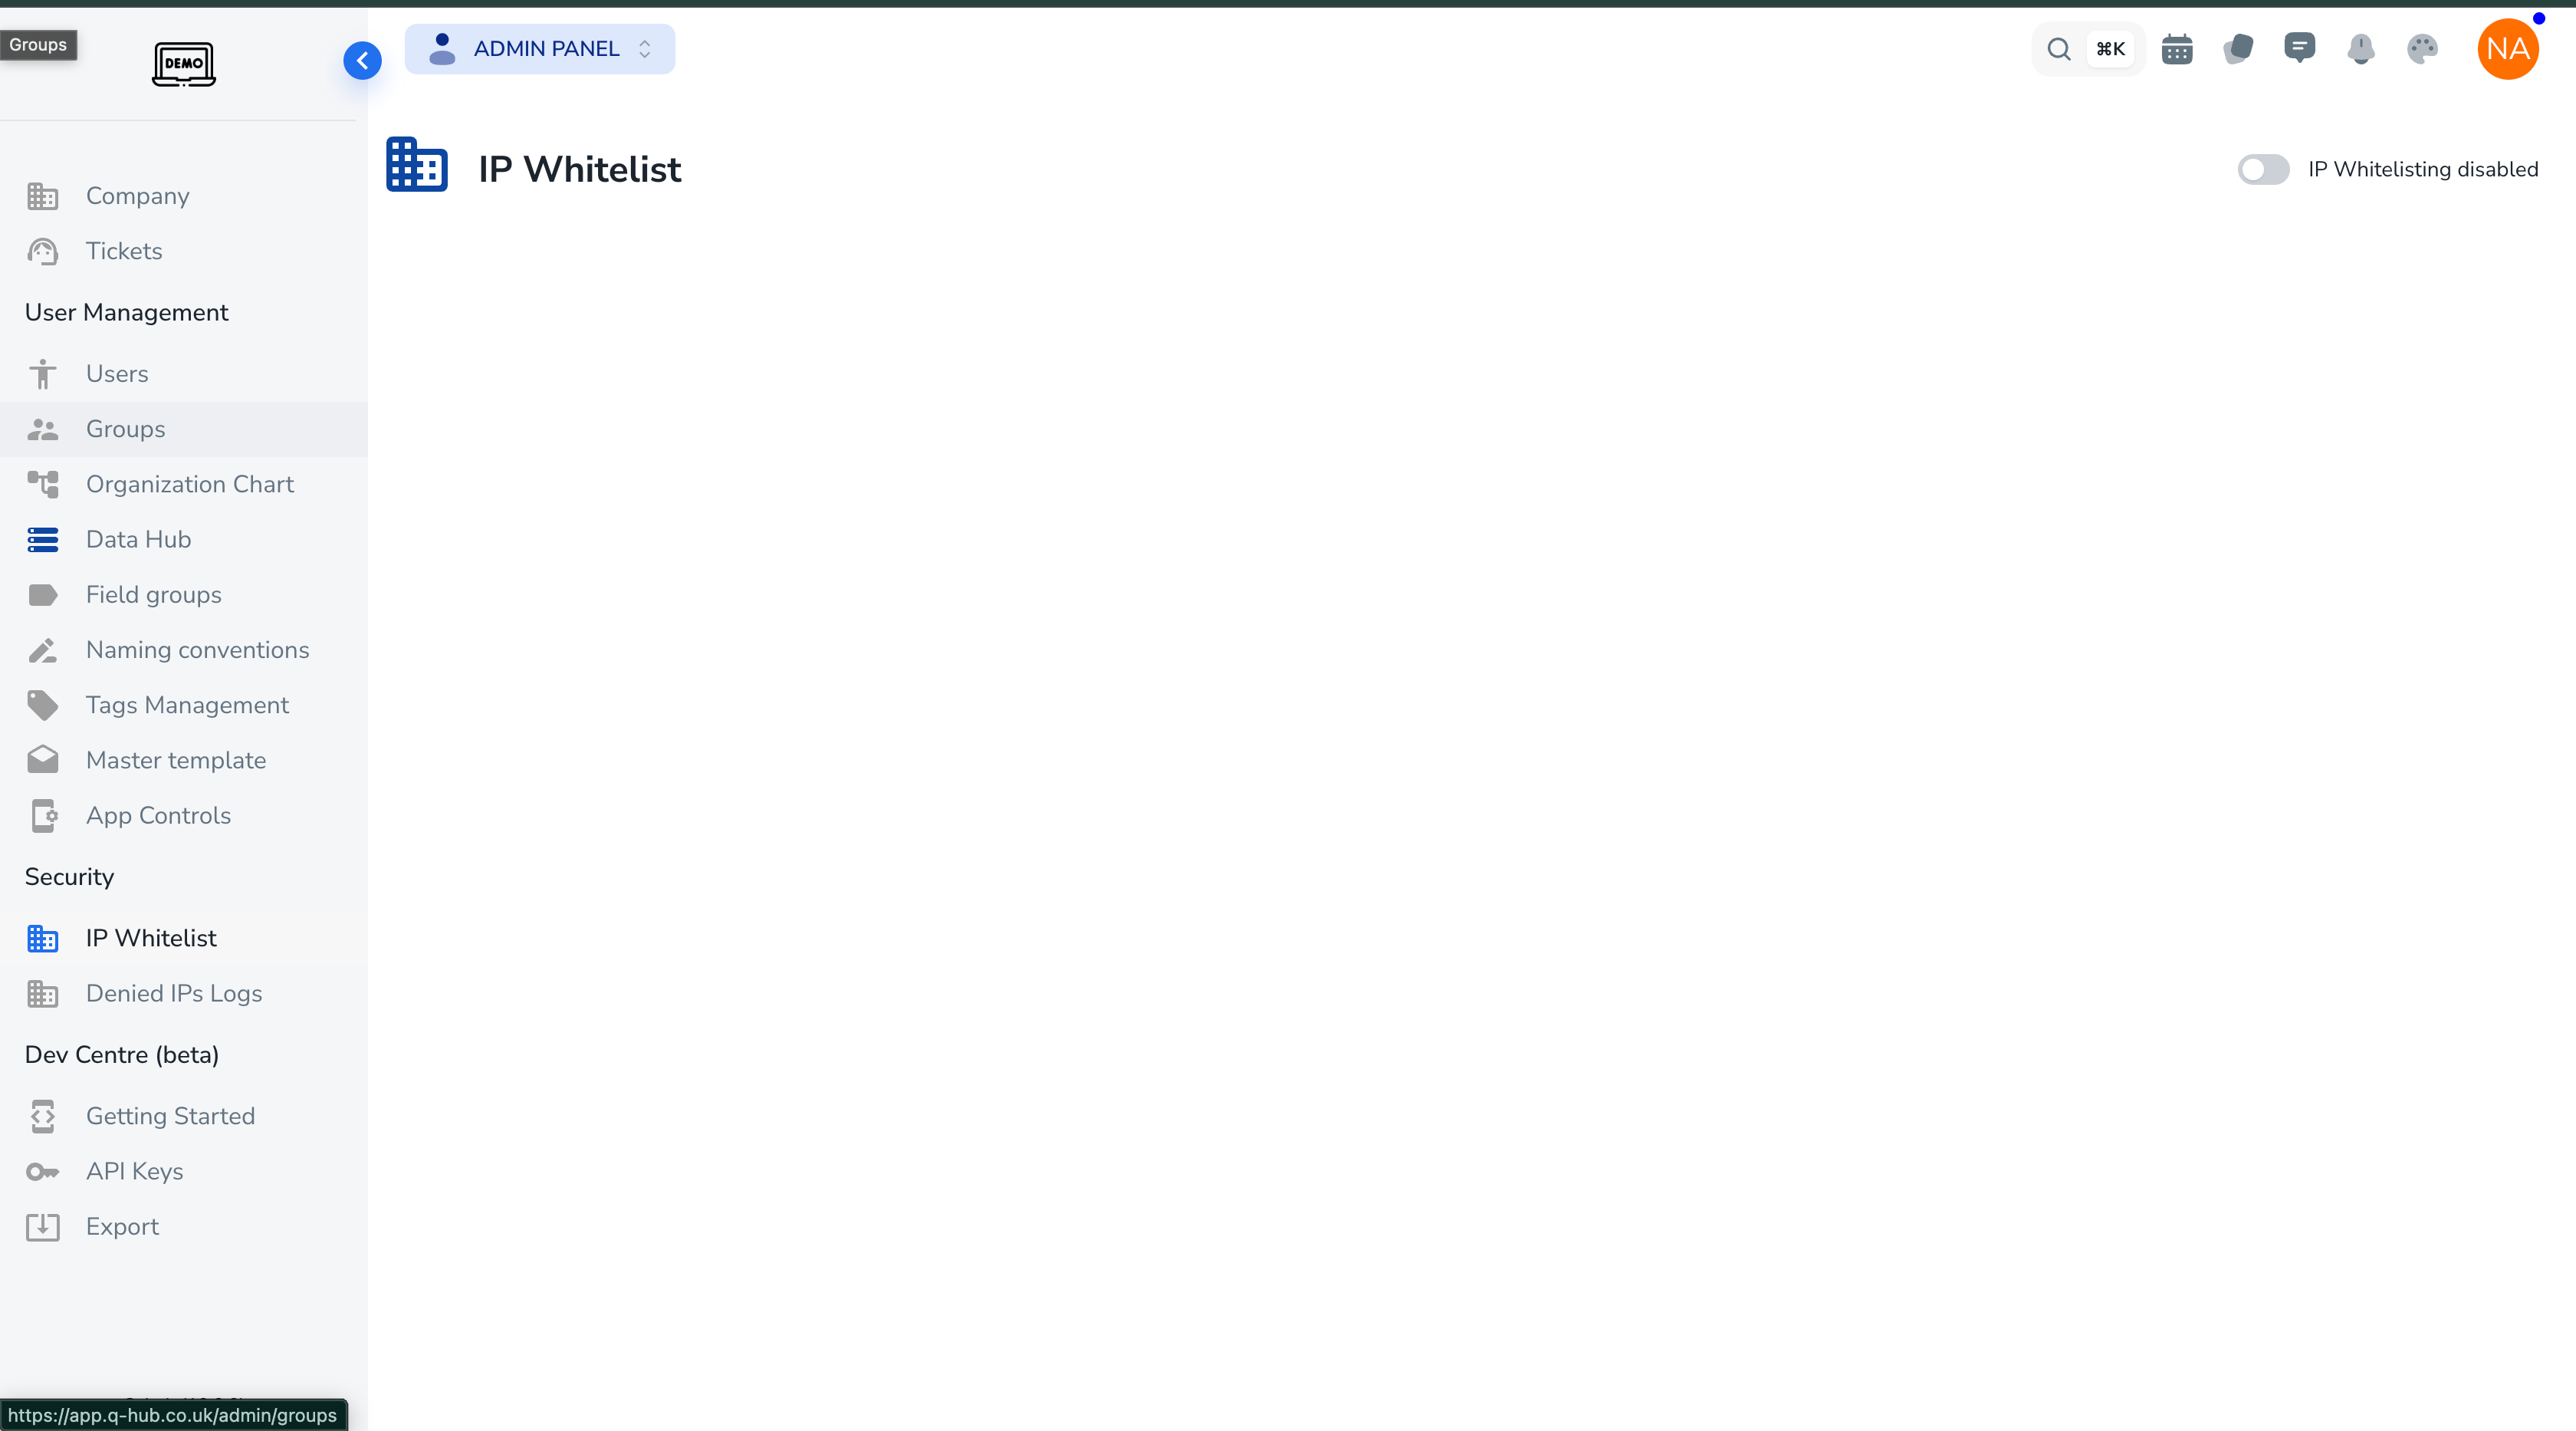
2. Enable IP Whitelisting
Click the toggle in the top-right of the IP Whitelist page. It will switch to IP Whitelisting enabled (blue).
The page header will update and the action buttons — + (Add IP) and ⚙ (Bypass Settings) — will appear alongside the toggle.
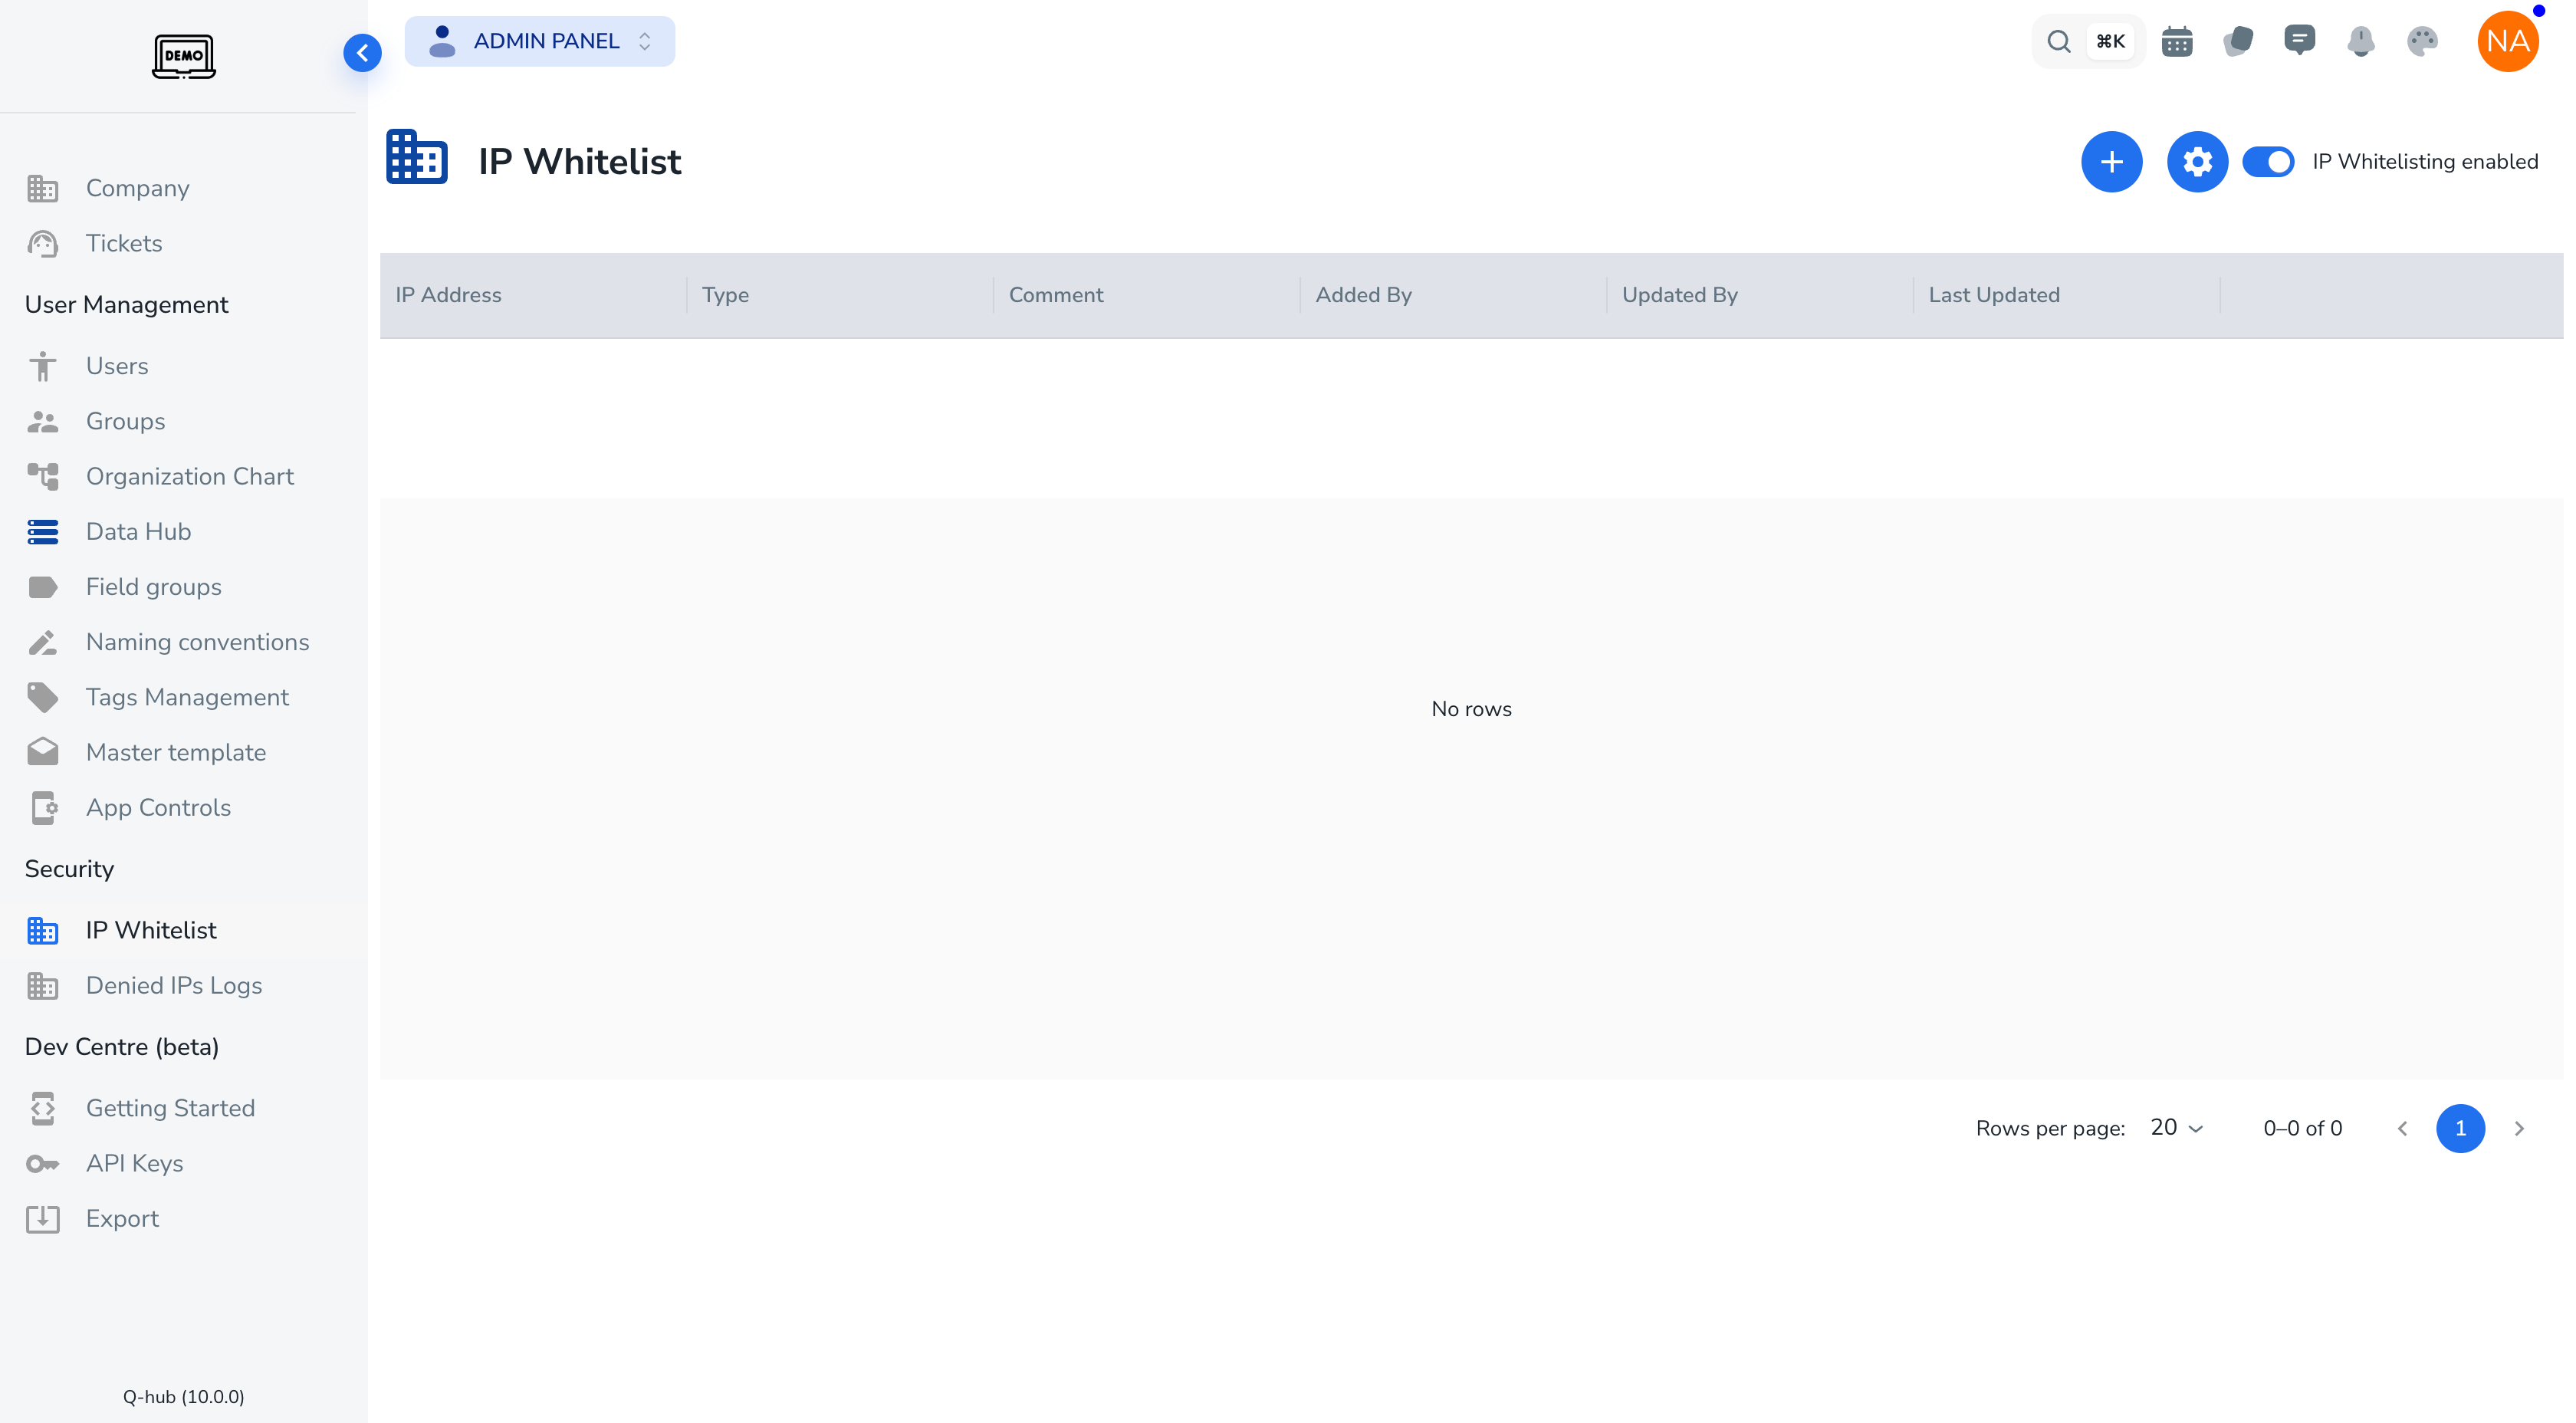
ℹ️ The toggle takes effect immediately. No additional save step is required.
🛡️ Failsafe: The Default User account is always exempt from IP Whitelist restrictions. If you accidentally lock all other users out, log in as the Default User to regain access and correct the whitelist.
3. Add an IP Address
Step 1 — Open the Add IP modal
Click the blue + button in the top-right of the page. The Add IP modal opens.
Step 2 — Fill in the form
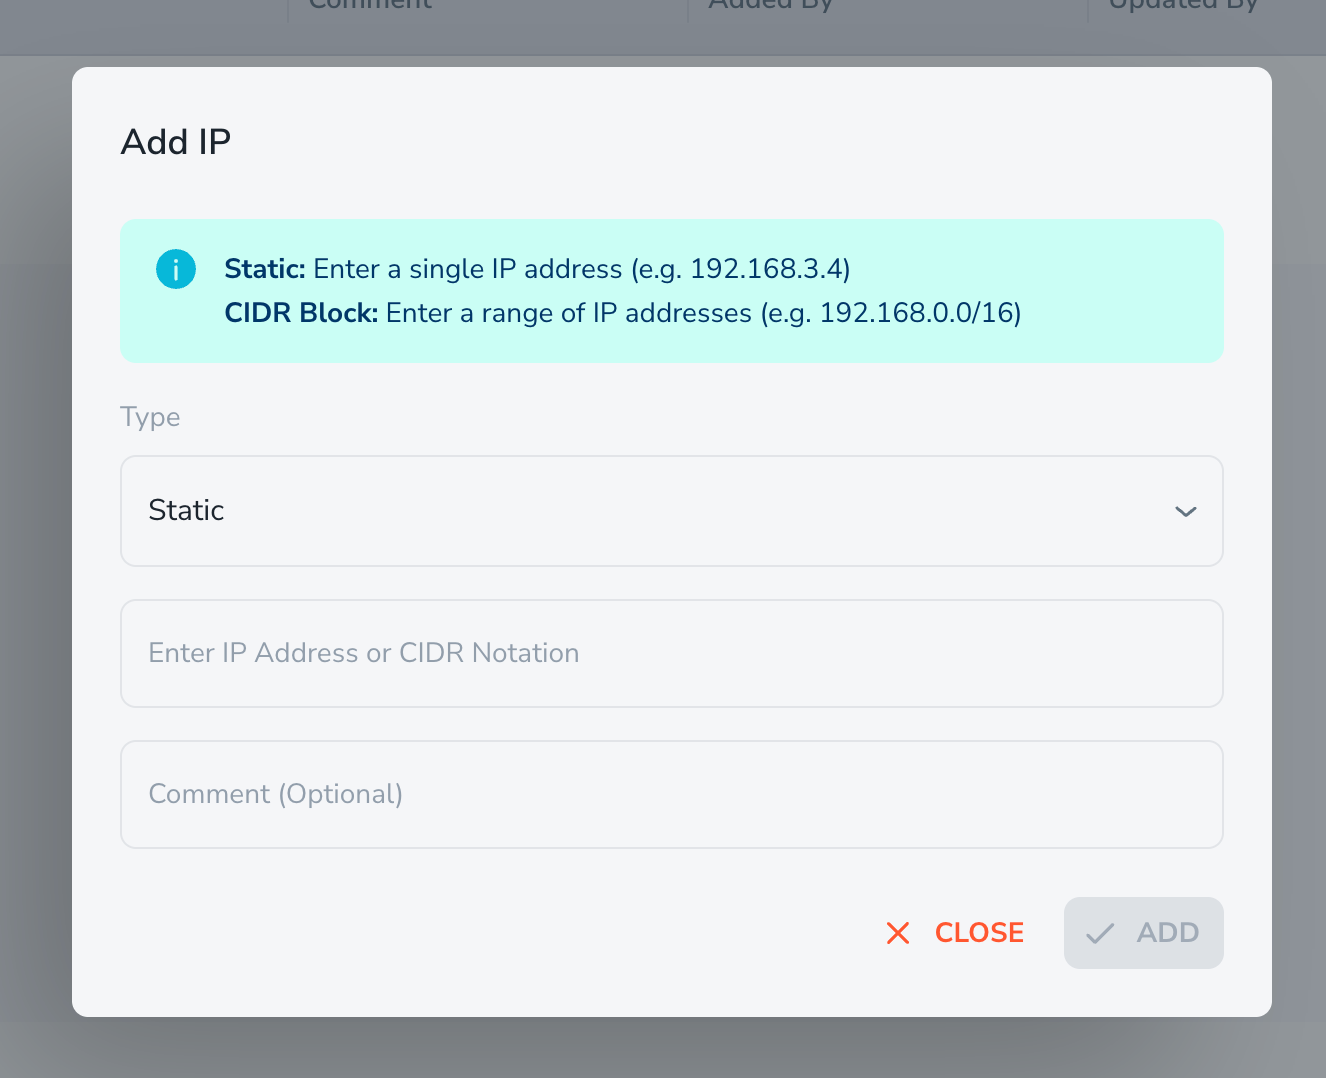
Field | Required | Description |
|---|---|---|
Type | Yes | Select |
IP Address / CIDR Notation | Yes | Enter the IP or range (see examples below) |
Comment | No | Optional internal note about this entry |
Format examples:
Static:
192.168.3.4CIDR Block:
192.168.0.0/16
Step 3 — Save the entry
Click ADD. The entry will appear as a new row in the whitelist table with the columns: IP Address, Type, Comment, Added By, Updated By, and Last Updated.
The ADD button remains greyed out until a valid IP or CIDR value is entered.
4. Manage the Whitelist Table
The whitelist table displays all whitelisted entries with the following columns:
Column | Description |
|---|---|
IP Address | The whitelisted IP or CIDR range |
Type |
|
Comment | Optional note added during creation |
Added By | The admin user who created the entry |
Updated By | The admin user who last modified the entry |
Last Updated | Timestamp of the most recent change |
Edit or Delete an entry
Use the action controls on the right side of each row to edit or delete an entry. Deletions take effect immediately.
⚠️ Do not delete your own IP while whitelisting is active — it will lock you out immediately with the exception for default user.
5. Configure Bypass IP Settings (SSO)
Click the ⚙ gear icon next to the + button to open the Bypass IP Settings modal.
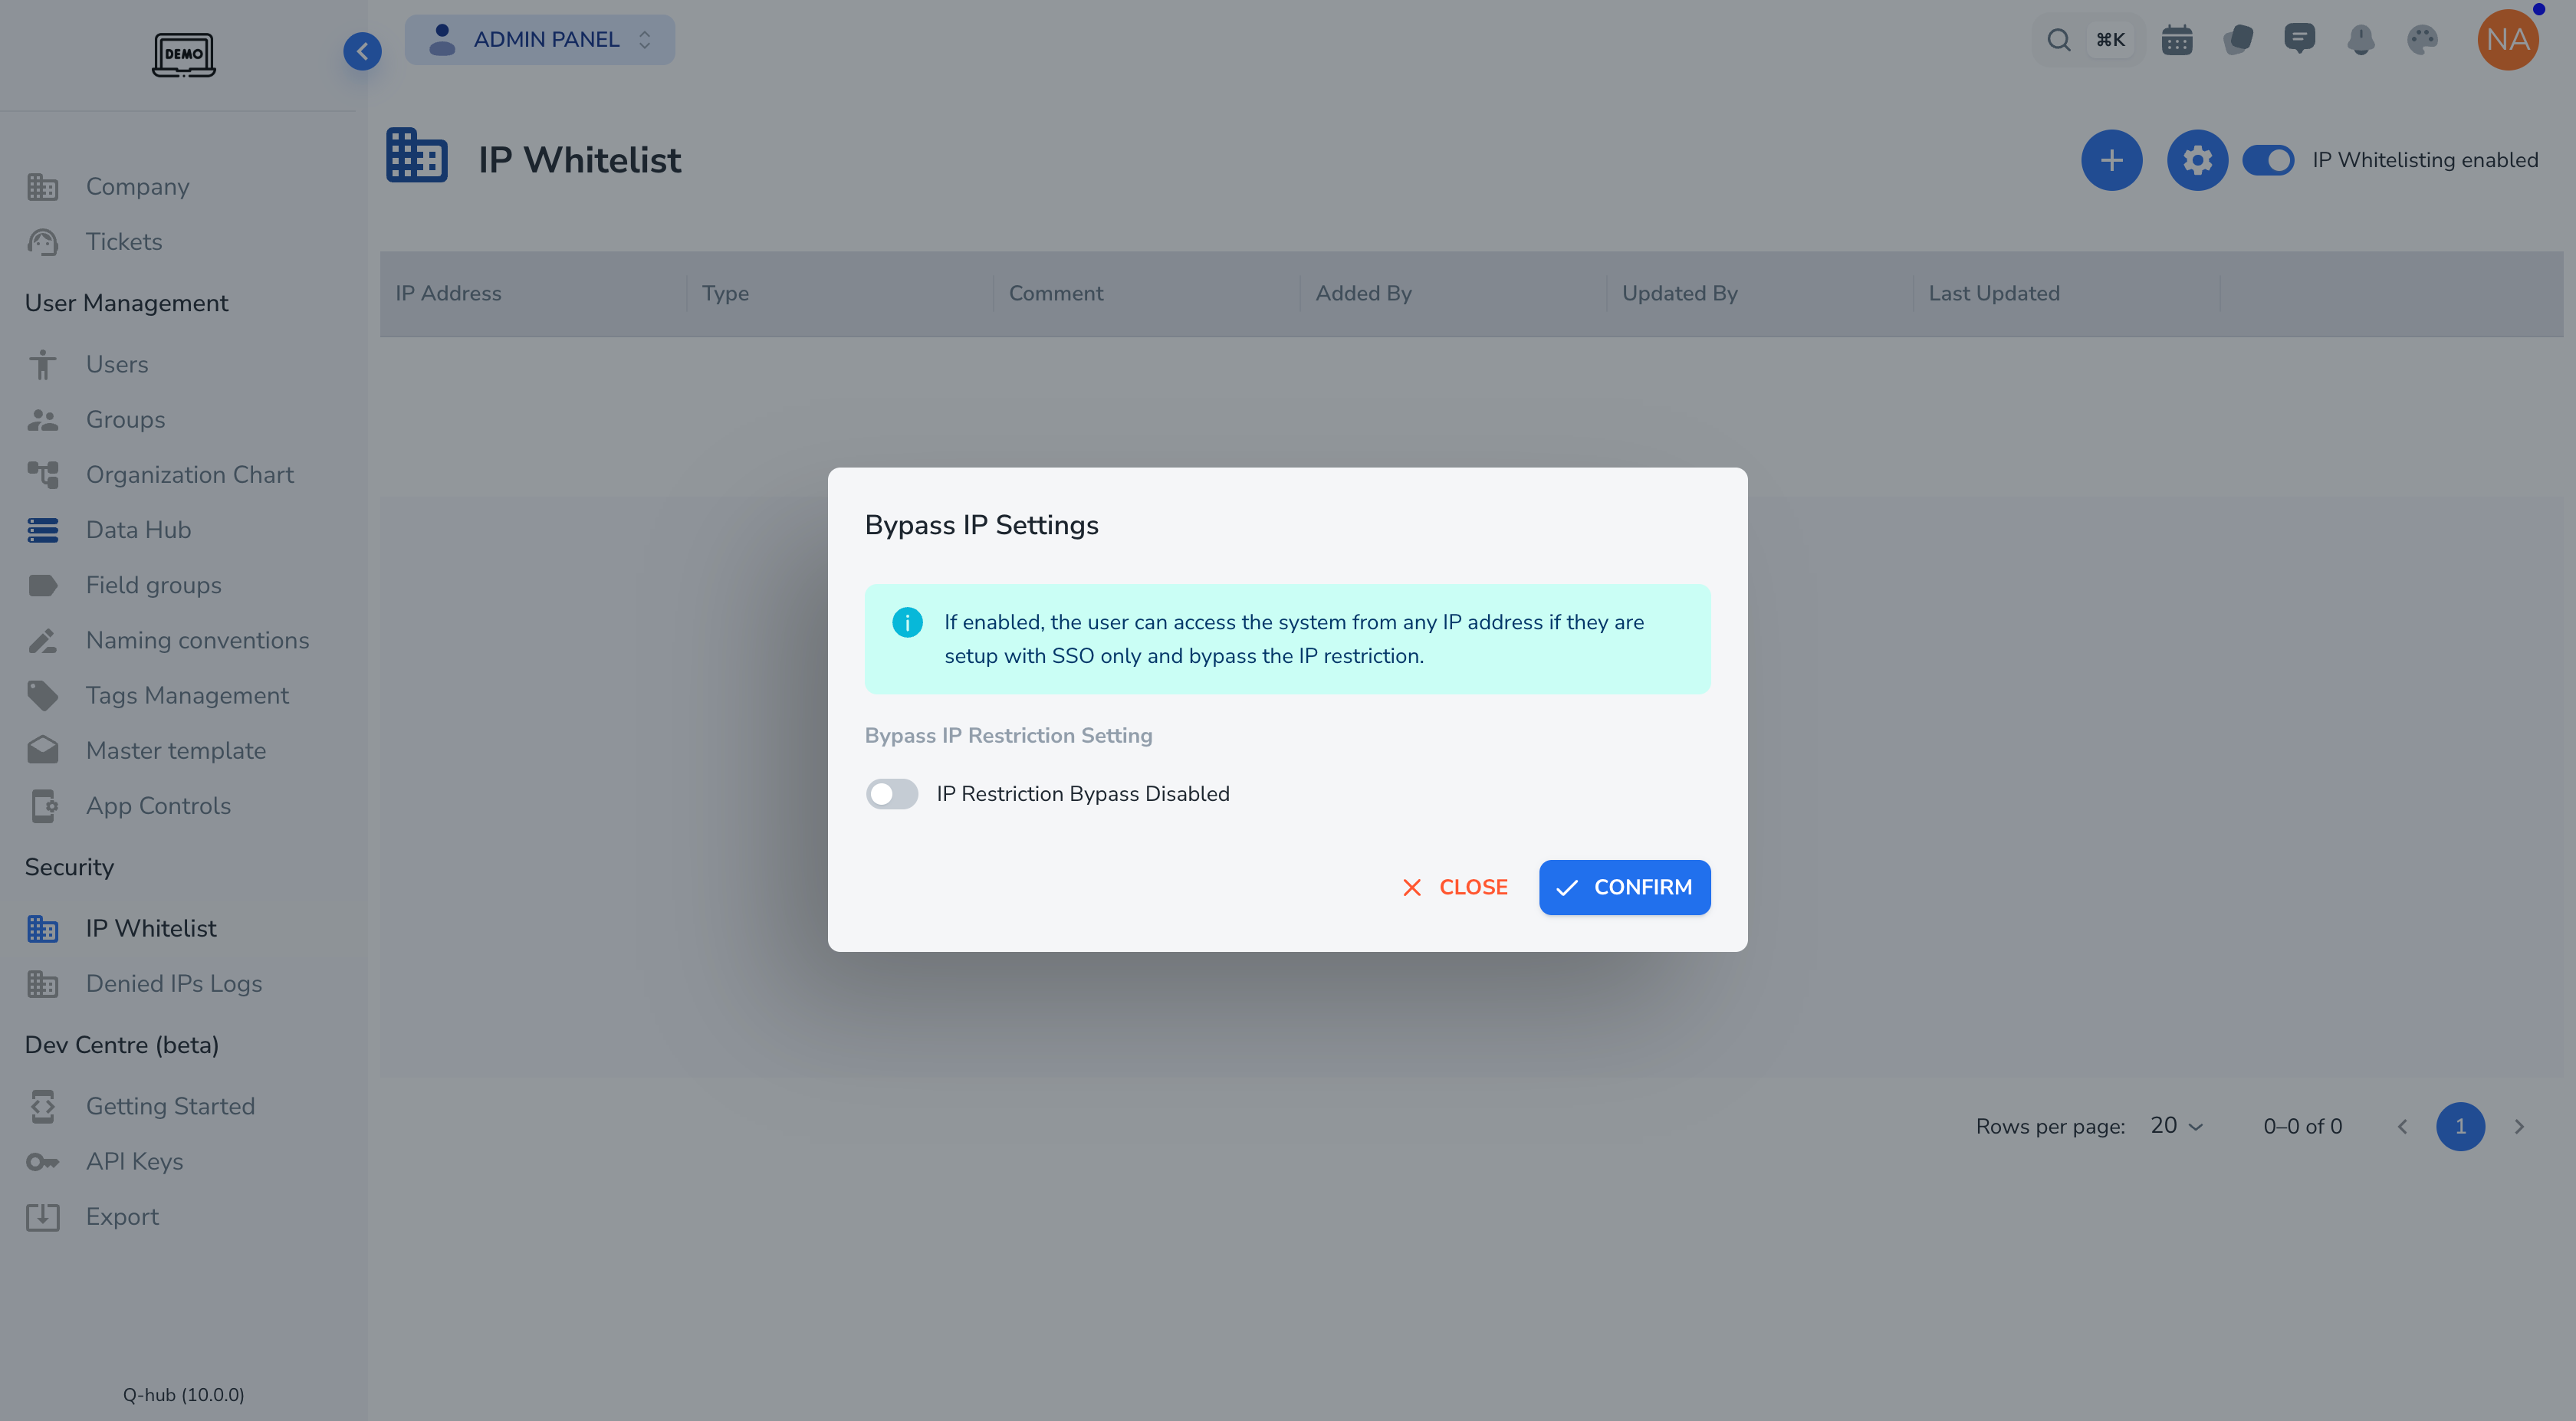
This setting controls whether SSO-only users can bypass IP restrictions:
"If enabled, the user can access the system from any IP address if they are setup with SSO only and bypass the IP restriction."
Toggle State | Behaviour |
|---|---|
Disabled (default) | All users — including SSO users — are subject to IP whitelist restrictions |
Enabled | Users authenticated via SSO only can log in from any IP, regardless of the whitelist |
Click CONFIRM to save, or CLOSE to discard changes.
6. View Denied IPs Logs
In the left sidebar, under Security, click Denied IPs Logs.
This page shows Access Logs for Denied IPs — a record of every blocked access attempt since whitelisting was enabled.
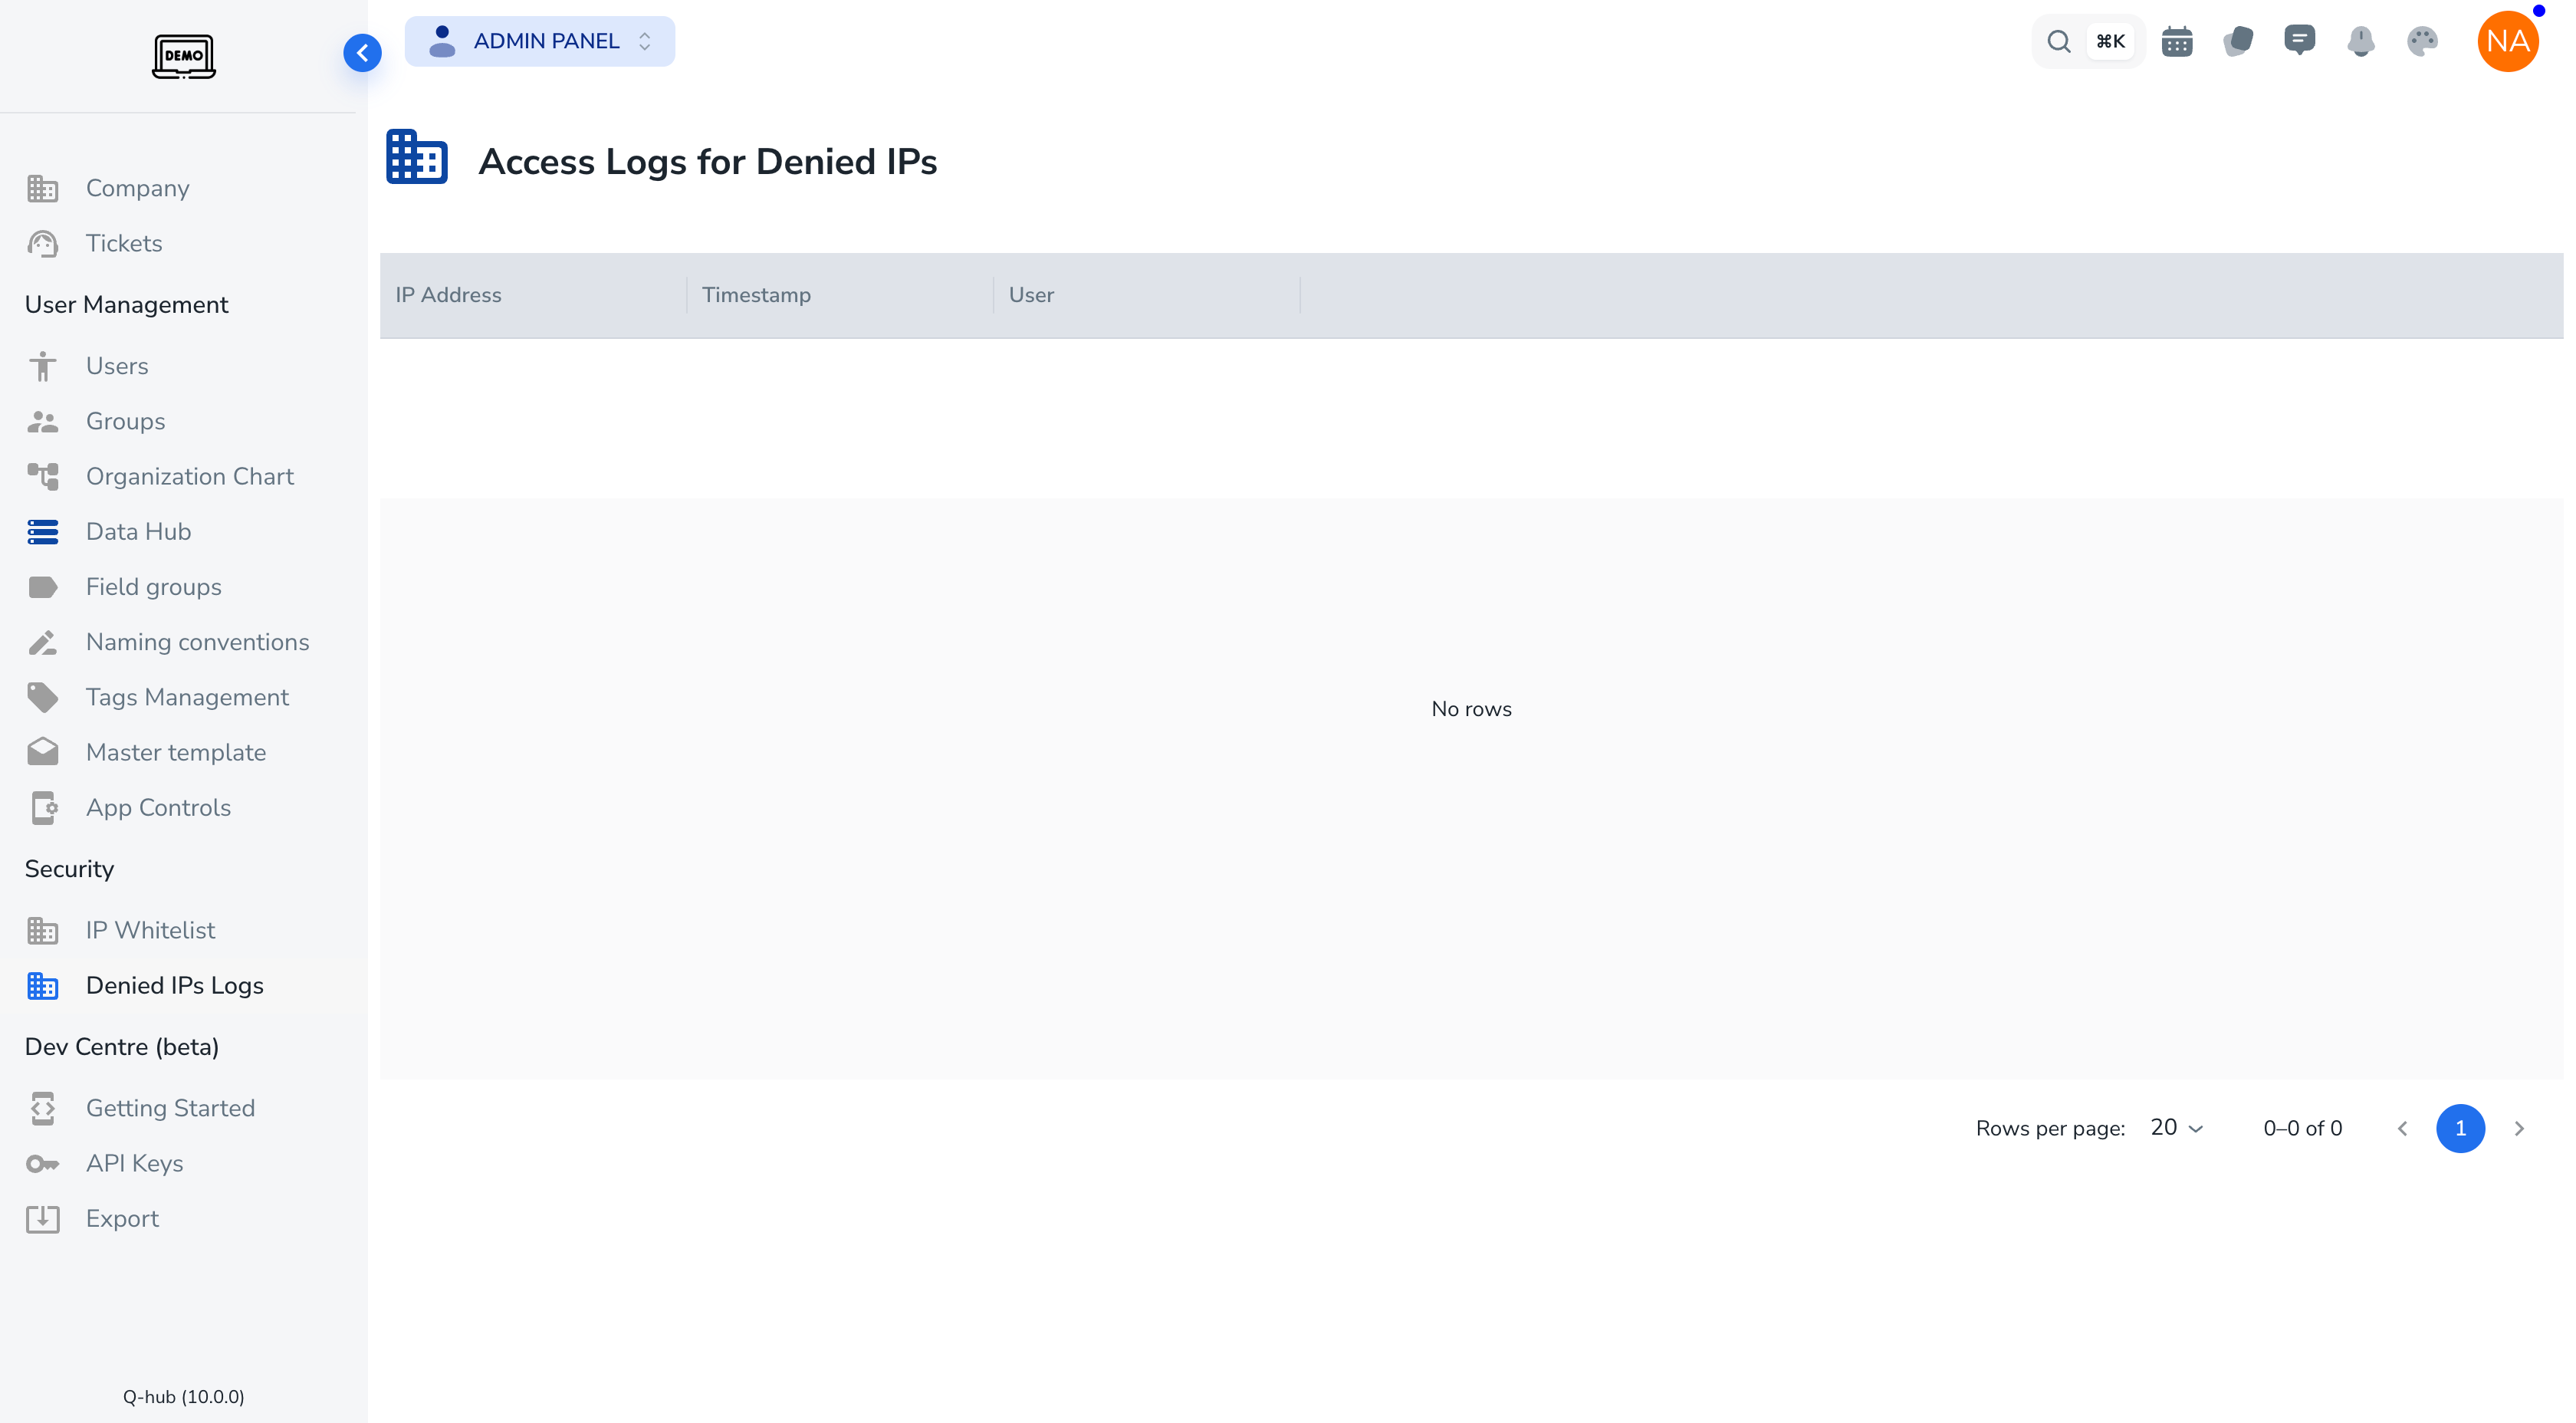
Column | Description |
|---|---|
IP Address | The IP that attempted access and was denied |
Timestamp | Date and time of the blocked attempt |
User | The user account that made the attempt (if identifiable) |
Use this log to:
Identify users locked out due to a missing whitelist entry
Audit unexpected access attempts
Diagnose misconfigured CIDR ranges
7. What a Restricted User Sees
When a user attempts to access the application from an IP address that is not on the whitelist, they are shown an access restriction overlay instead of the application — regardless of whether they have valid credentials.
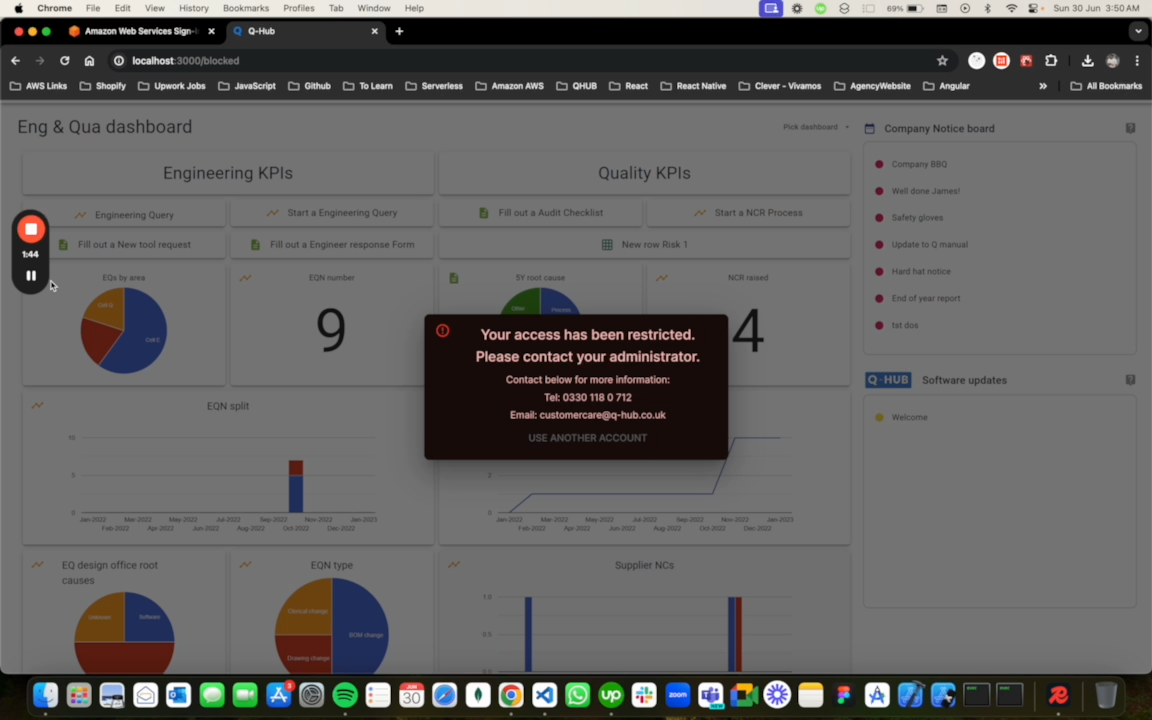
The message displayed reads:
Your access has been restricted. Please contact your administrator.
Contact below for more information:
Tel: 0330 118 0 712
Email: customercare@q-hub.co.uk
The user is also given a USE ANOTHER ACCOUNT option, which allows them to attempt login with a different account (e.g. one that has SSO bypass enabled).
What the admin should do
If a user reports seeing this screen:
Go to Security → IP Whitelist and check whether the user's egress IP is listed.
If it is missing, add it (see Add an IP Address).
If the user is on SSO, consider enabling the Bypass IP Settings toggle (see Section 5).
Check Security → Denied IPs Logs to confirm the user's IP and the timestamp of the blocked attempt.
🛡️ Locked out entirely? Log in using the Default User account — it always bypasses IP restrictions — then update the whitelist to restore access for other users.
8. Disable IP Whitelisting
Click the blue toggle in the top-right of the IP Whitelist page to switch it off. The label will return to IP Whitelisting disabled and all users will regain access from any IP immediately.
Existing whitelist entries are preserved — they will be re-applied if the feature is re-enabled.
9. Field Reference
Add IP Form
Field | Required | Format | Notes |
|---|---|---|---|
Type | Yes | Dropdown: | Determines how the IP value is interpreted |
IP Address or CIDR Notation | Yes | IPv4 / CIDR |
|
Comment | No | Free text | Internal note, not shown to end users |
Bypass IP Settings
Field | Required | Notes |
|---|---|---|
IP Restriction Bypass | No | Toggle — allows SSO-only users to skip IP checks |
Related Pages
Authentication & SSO — configure SSO providers that interact with the bypass setting