This guide explains how Single Sign‑On (SSO) works in QHub and how to configure it in the Admin Panel. It covers:
Choosing the default SSO provider (Microsoft or Google)
Enforcing SSO globally
Setting up exceptions and targeted enforcement rules
Domain restrictions for Google SSO
Active Directory settings for Microsoft SSO
Managing secure sign‑up links
Where to Configure SSO
You’ll configure SSO in two areas of the Admin Panel:
Company Settings → Default SSO Method & Enforcement Rules
Users → User Authentication Settings
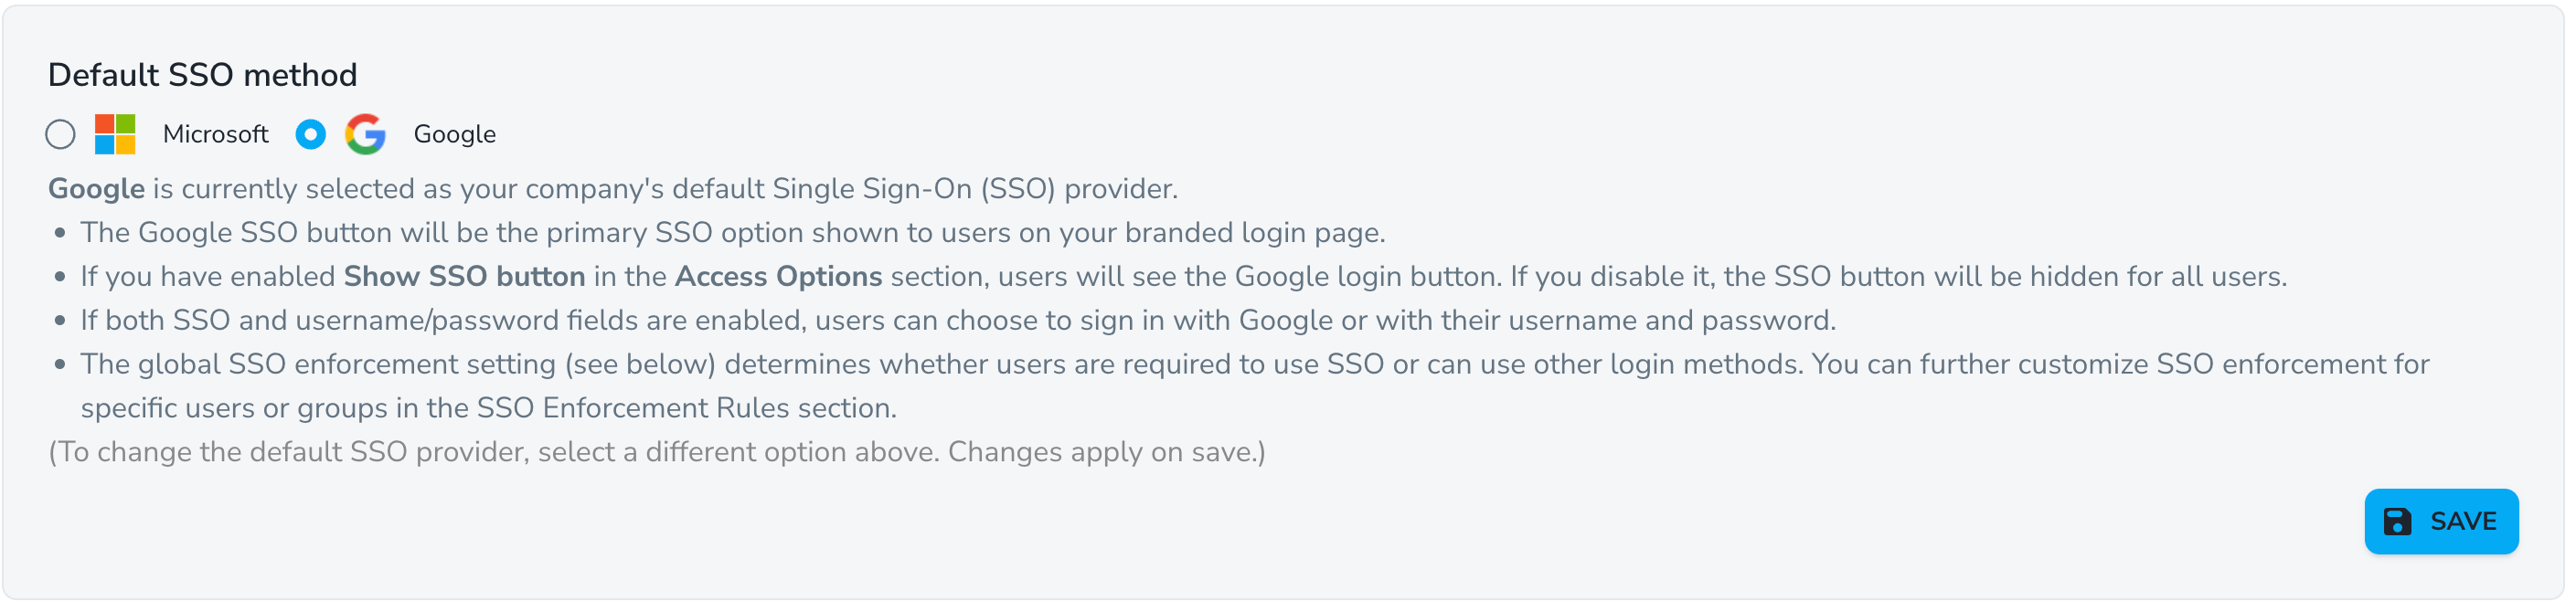
Set your company's default Single Sign-On provider in the Company Settings area.
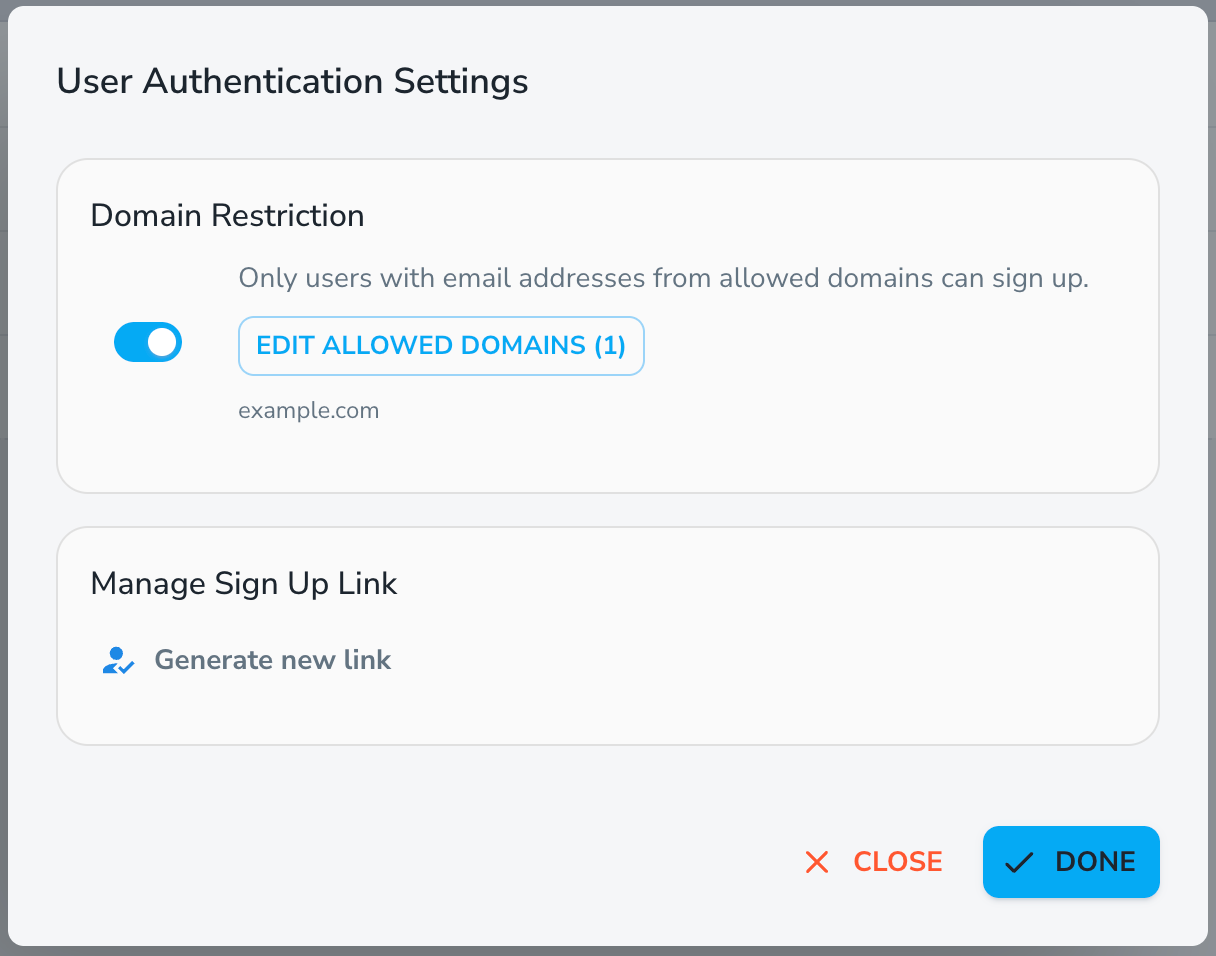
Configure domain restrictions and sign-up links in the User Authentication Settings area of the Admin Panel.
Open more info on Single Sign‑On (SSO) in QHub
When should I use each option?
Scenario
Recommended setting / option
You want everyone to sign in via SSO
Turn SSO enforcement ON
You only want some users to be forced to SSO
Leave enforcement OFF, then require SSO for those users/groups
You need a few users to skip SSO
Turn enforcement ON, then exclude those users/groups
You only trust certain email domains
Use Google domain restriction
You use Microsoft 365 / Azure AD
Enable Microsoft SSO and turn Active Directory = Active with Tenant IDs
You want an easy way to invite new users
Generate a secure sign‑up link
Use Company Settings to:
Choose your default SSO method (Microsoft or Google)
Turn SSO enforcement on or off
Set include/exclude rules for specific users and groups
Use Users → User Authentication Settings to:
Restrict Google SSO sign‑ups to certain email domains
Configure Microsoft Active Directory (on/off + Tenant IDs)
Generate and share a secure, time‑limited sign‑up link
Default SSO method only controls which provider’s button is shown first on the login page. It does not force everyone to use SSO.
SSO enforcement:
When enabled: everyone must use SSO by default; you can add exceptions that may still use standard login.
When disabled: standard login is allowed; you can still require SSO for specific users or groups.
Google domain restriction lets you control which email domains are allowed to sign up when using Google SSO.
Microsoft Active Directory:
Inactive: users can use standard sign‑in methods (as allowed by your config).
Active: users must sign in via your organization’s Active Directory and you must provide one or more Tenant IDs based on your access level.
Sign‑up link:
Create a secure, time‑limited link for new users.
The link expires automatically and must be regenerated when needed.
1) Default SSO Method (Company Settings)
This setting controls which SSO provider appears as the primary option on the login page.
Available choices:
Microsoft
Google
What this affects
The primary SSO button displayed on the login page
Whether the SSO button appears at all (depends on Access Options → Show SSO button)
Users can still sign in with a username and password if that option is enabled
Set your company's default Single Sign-On provider in the Company Settings area.
2) SSO Enforcement (Company Settings)
SSO enforcement determines whether users must sign in using SSO.
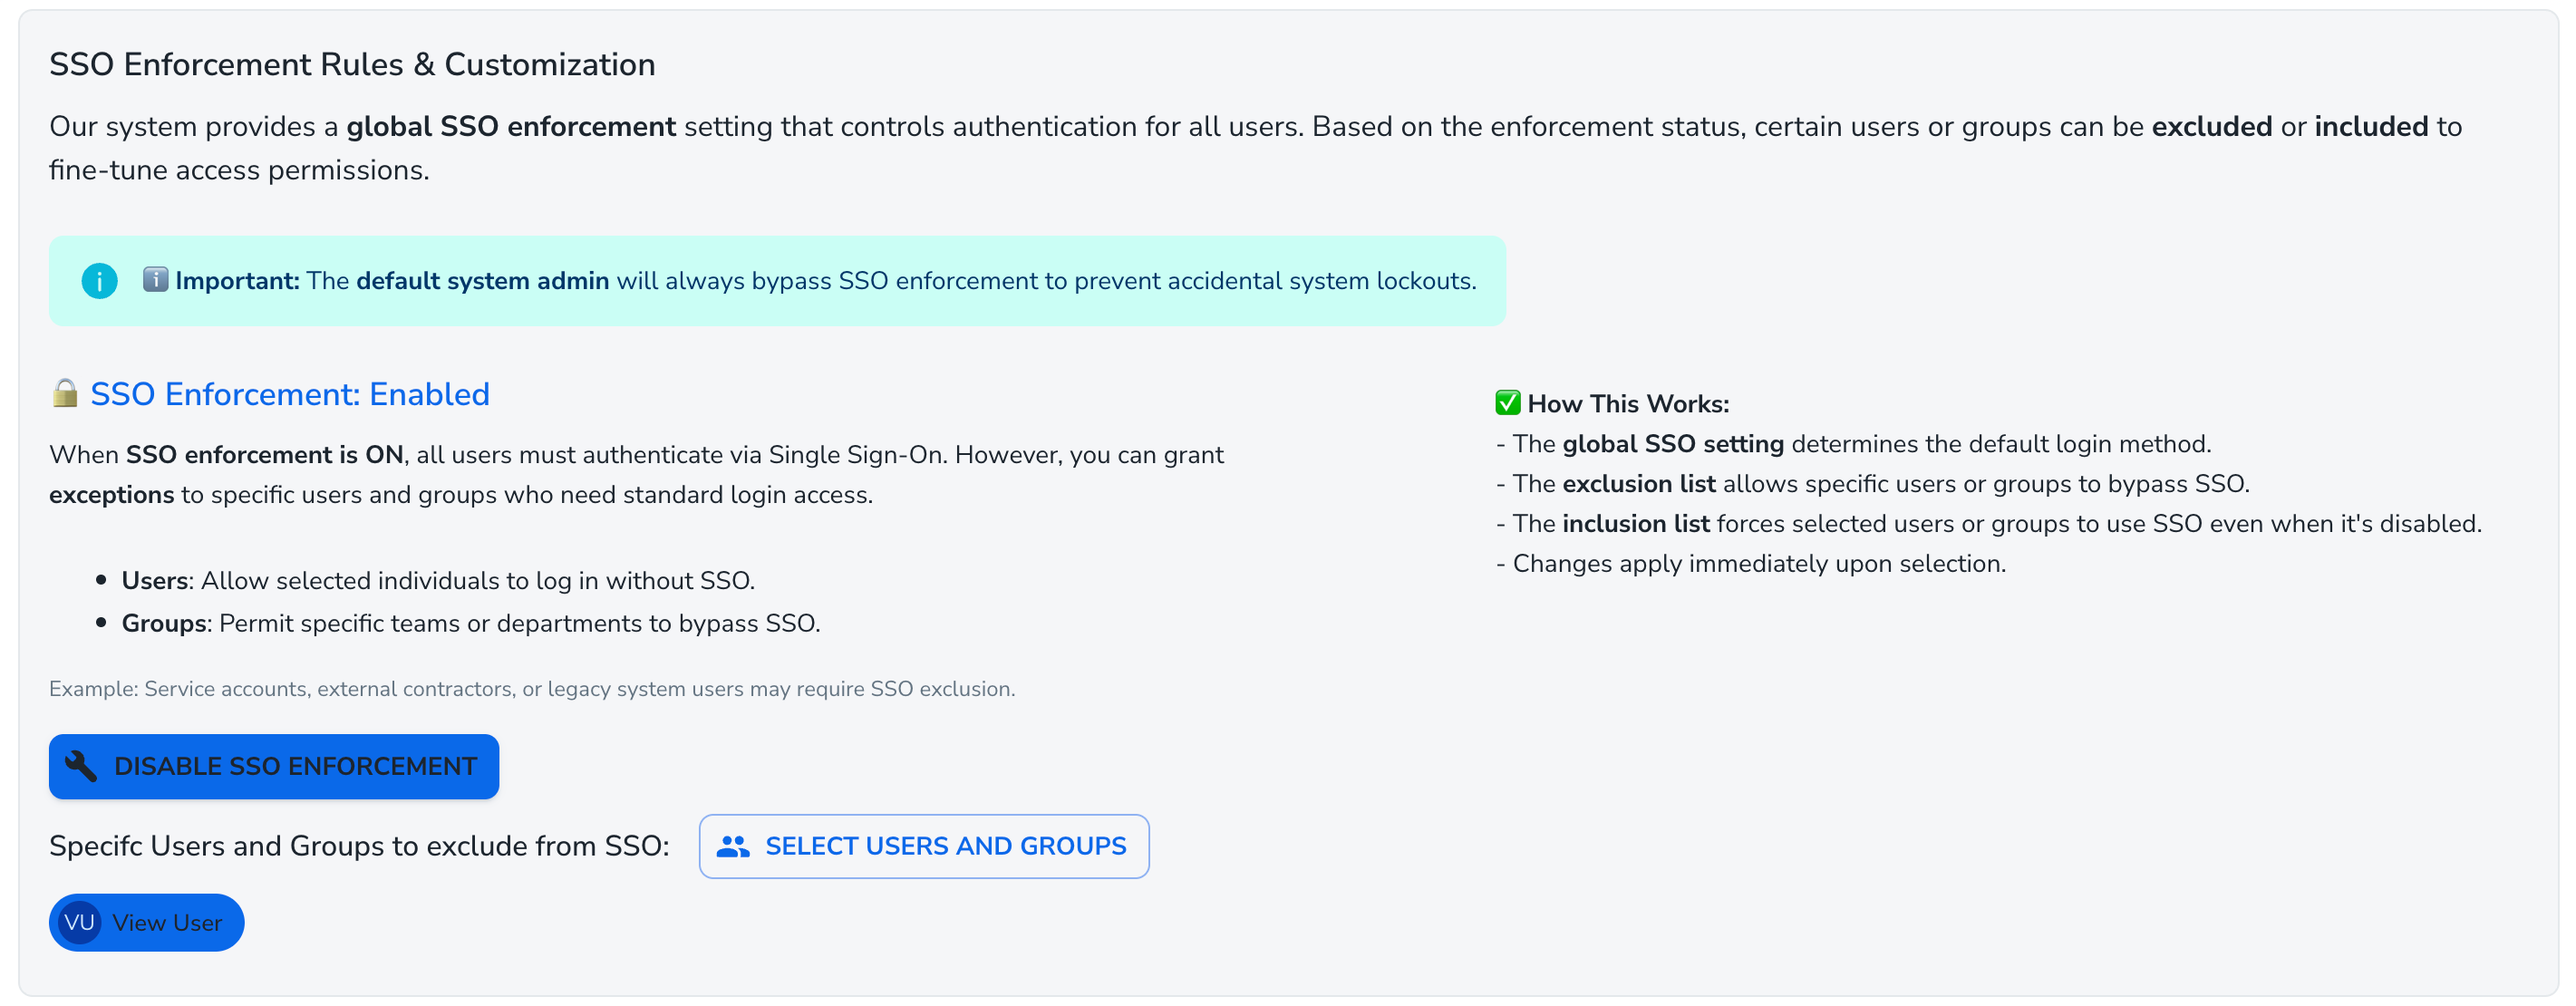
When SSO Enforcement is Enabled
All users must use SSO by default
You can configure exceptions (specific users or groups that are allowed to use standard login)
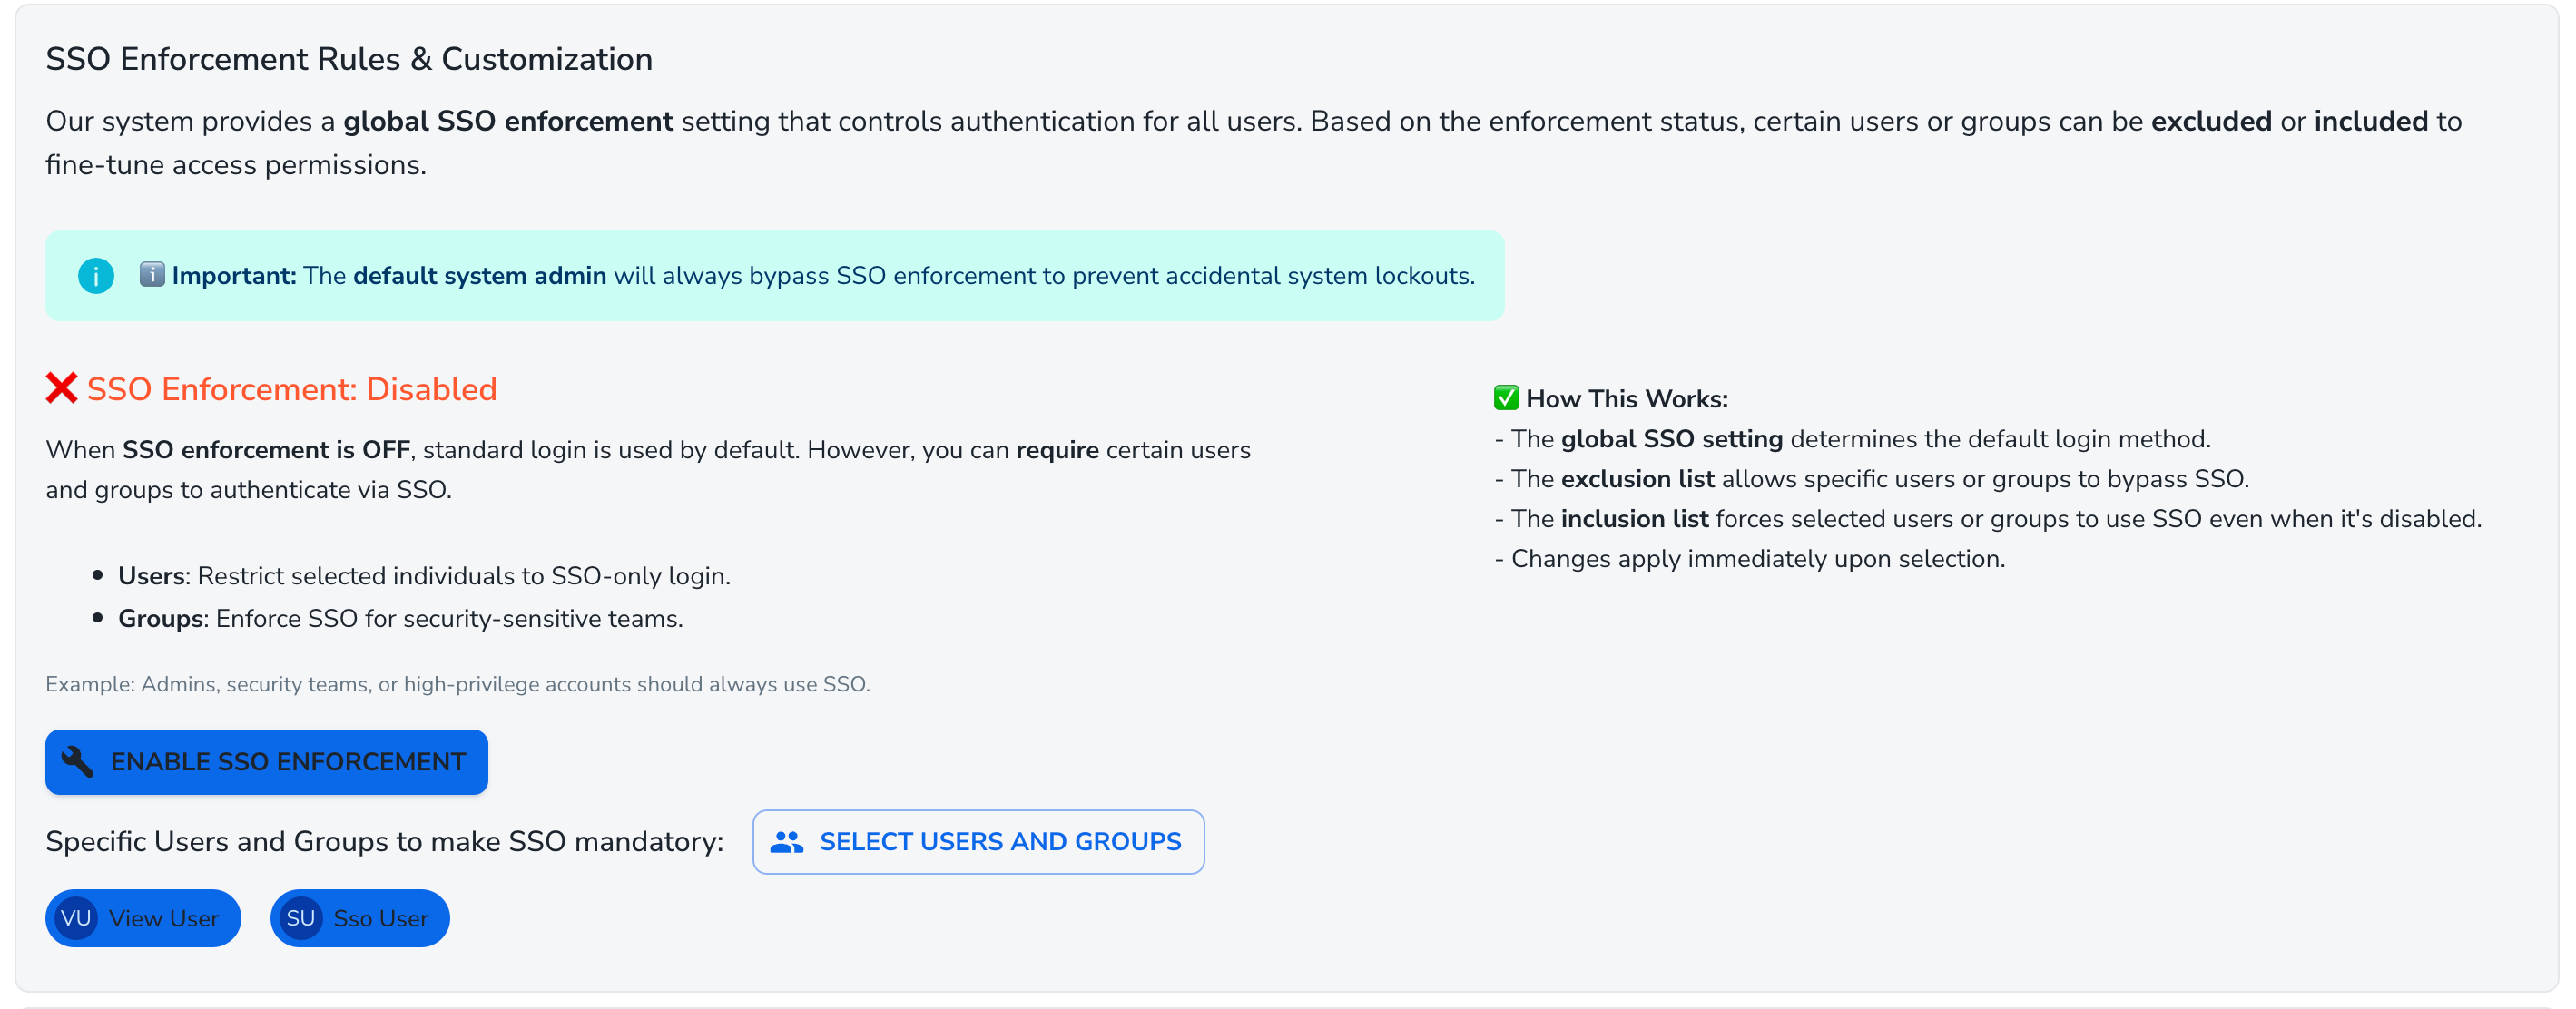
When SSO Enforcement is Disabled
Standard (username/password) login is allowed by default
You can still require SSO for specific users or groups
Important The default system admin can always bypass SSO enforcement. This is to prevent accidental lockout from the system.
When SSO enforcement is enabled, you can exclude specific users and groups from the requirement or include them to force SSO usage.
3) SSO Exceptions & Targeted Rules
Use enforcement rules to fine‑tune how SSO applies to different users and groups:
Exclude specific users or groups when enforcement is ON
(i.e., they may use standard login while others must use SSO)
Include specific users or groups when enforcement is OFF
(i.e., they must use SSO while others can use standard login)
Typical use cases:
Service accounts or external contractors that need non‑SSO access
Administrators or high‑privilege groups that should always be required to use SSO
When SSO enforcement is disabled, you can selectively require SSO for specific users or groups using the inclusion list.When SSO enforcement is enabled, you can exclude specific users and groups from the requirement or include them to force SSO usage.
4) Domain Restriction (Google SSO)
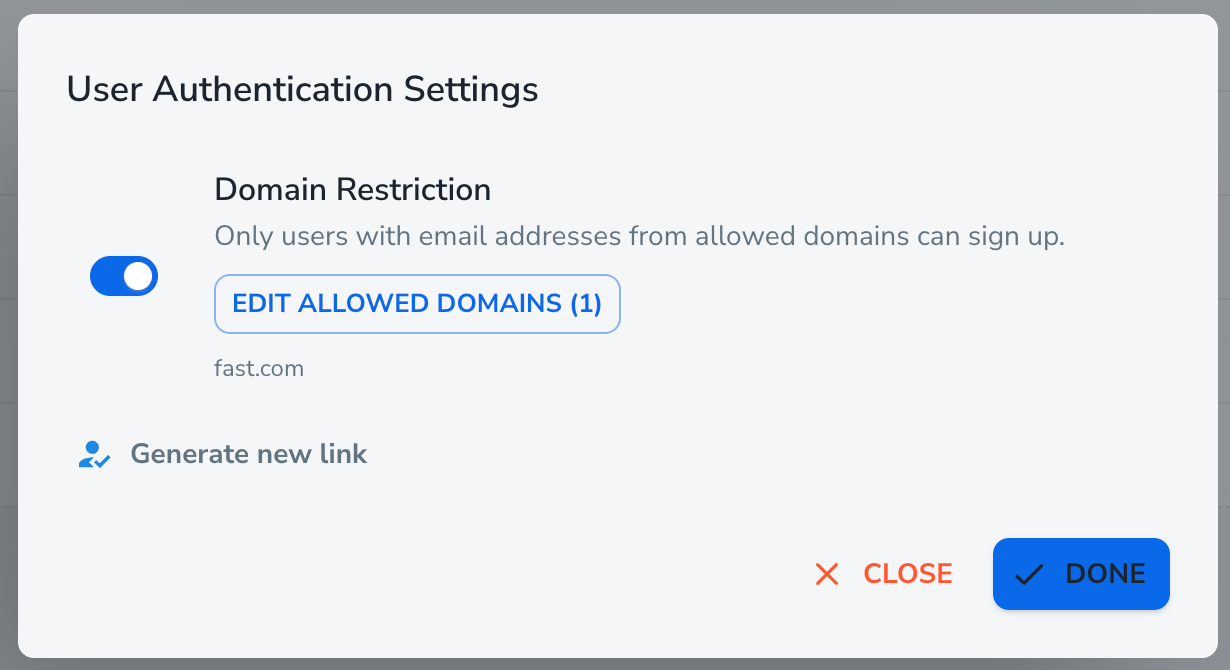
If Google SSO is active (and multi‑domain restriction is not enabled), you’ll see a Domain Restriction section under User Authentication Settings.
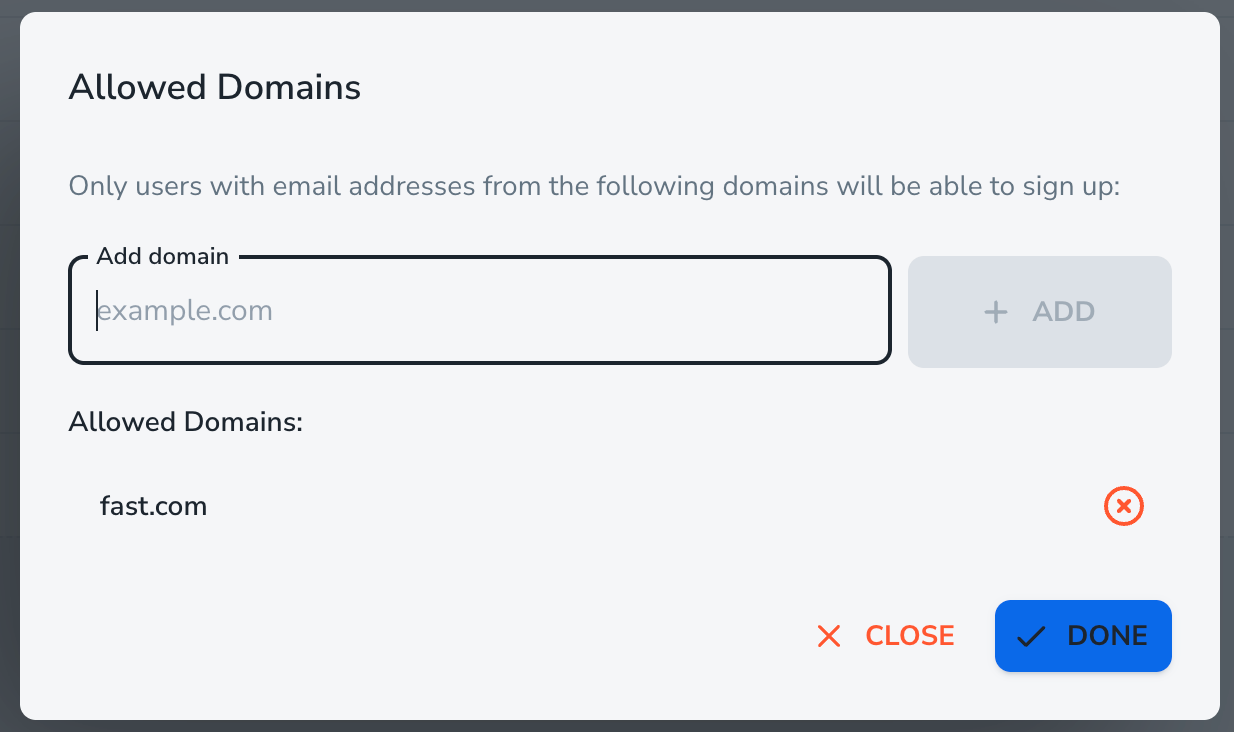
Use this section to limit sign‑ups to specific email domains. Only users with approved domains will be able to sign up.
The Domain Restriction feature limits sign-ups to users with email addresses from approved domains.Use Domain Restriction to limit Q-Hub sign-ups to users with email addresses from approved domains.
5) Active Directory Settings (Microsoft SSO)
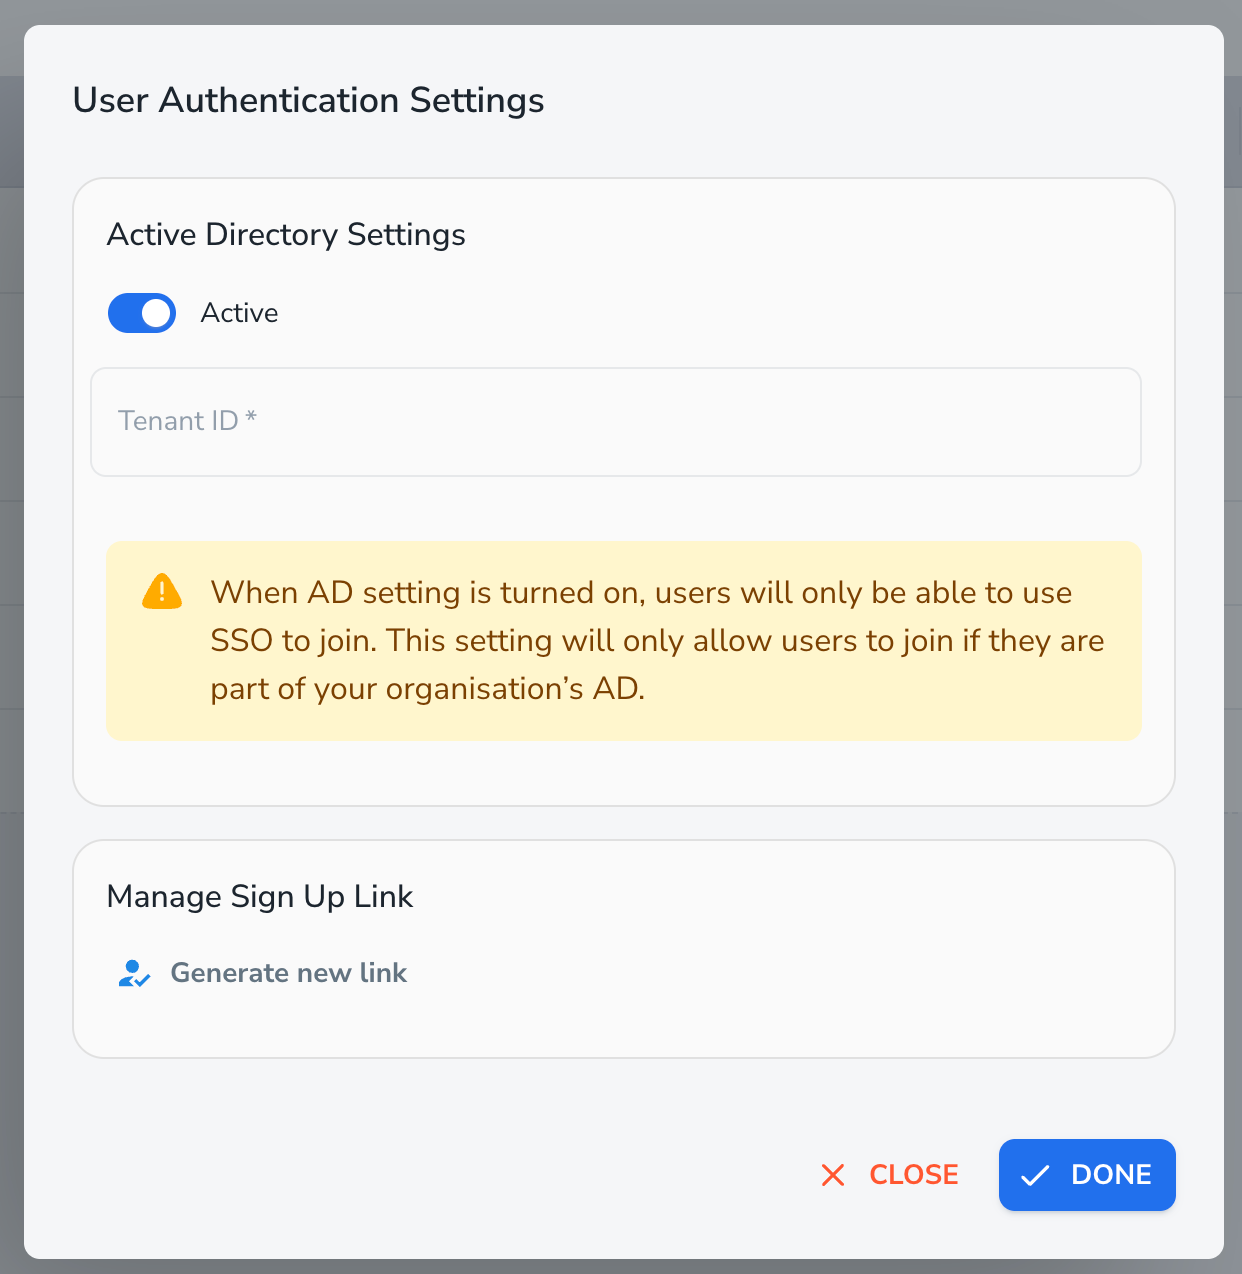
If Microsoft SSO is active, an Active Directory Settings section will be available.
Active / Inactive toggle
Inactive – Users can sign in using standard methods (as allowed by your configuration).
Active – Users must authenticate through your organization’s Active Directory.
Tenant IDs
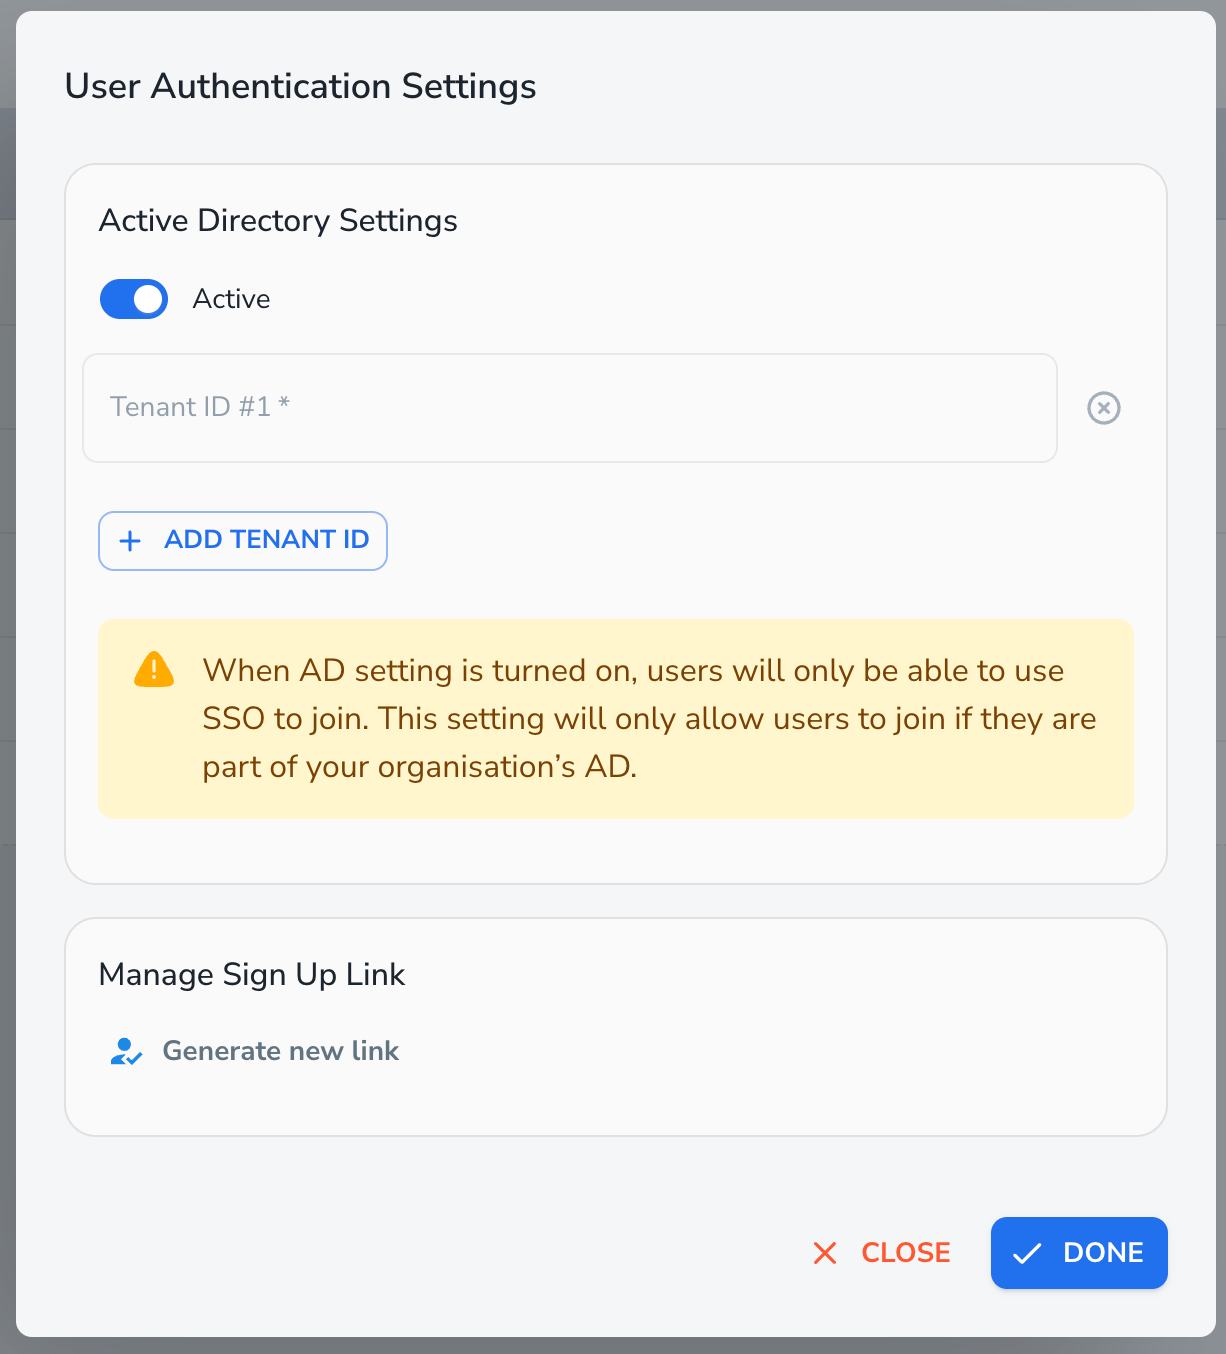
When Active Directory is set to Active, you must provide one or more Tenant IDs:
Single‑tenant: enter one Tenant ID
Multi‑tenant: enter multiple Tenant IDs (Paid feature: availability depends on your QHub plan and admin access.)
Behaviour details:
Turning Active ON adds a Tenant ID field if it does not already exist
Turning Active OFF clears all Tenant IDs to avoid invalid configurations
The User Authentication Settings screen where you enable Active Directory integration and configure the Tenant ID for SSO access control.Enable Active Directory and enter your organisation's Tenant ID to restrict SSO access to users within your AD.
6) Sign‑Up Link (User Authentication Settings)
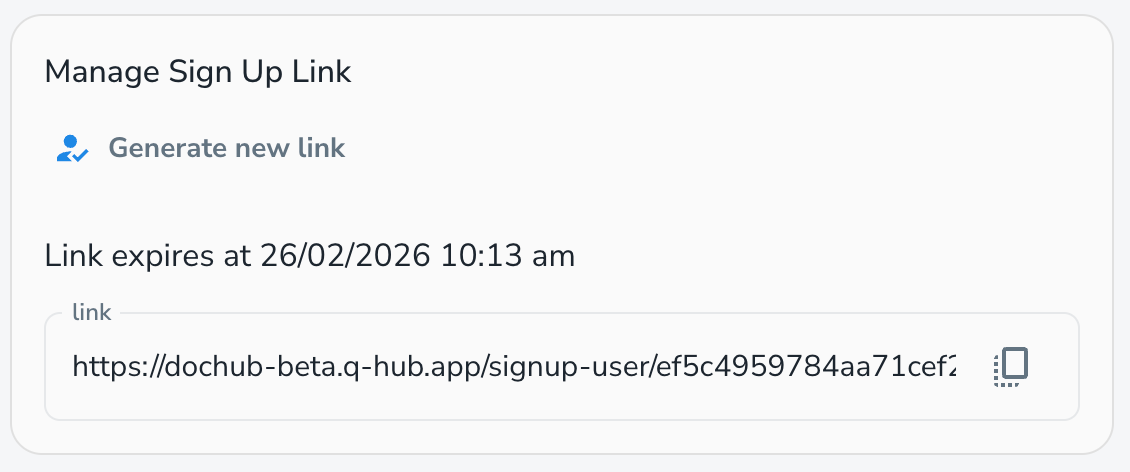
The Sign‑Up Link section allows you to generate and share a secure, time‑limited link for new users.
You can:
Click Generate new link to create a fresh sign‑up link
Automatically copy the new link to your clipboard when it’s generated
View the link’s expiration time in the dialog
Regenerate the link once it expires (expired links are automatically disabled)
Use the copy icon at any time to copy the current active link
Use the Generate new link option to create a signup URL, which expires at the specified date and time.
Saving Changes
Changes made in Company Settings are saved through their respective Save buttons.
Changes made in User Authentication Settings are saved using Done.
Important If Active Directory is enabled and no Tenant IDs are entered, the Done button is hidden. This prevents saving incomplete or invalid settings.
Quick FAQ
Q: Does changing the default SSO method force everyone to use SSO? A: No. Changing the default SSO method only updates which provider appears as the primary option on the login page. Whether users are required to use SSO is controlled separately by the SSO Enforcement settings.
Q: Who can bypass SSO enforcement? A: The default system admin can always bypass SSO enforcement to avoid accidental lockout. In addition, you can define exclusions for specific users or groups when enforcement is enabled.
Q: What happens if the sign‑up link expires? A: Once the sign‑up link expires, it becomes inactive and can no longer be used. To continue inviting users, simply generate a new sign‑up link from the User Authentication Settings.

 Help Centre