Get started with Asset hub
Feature overview
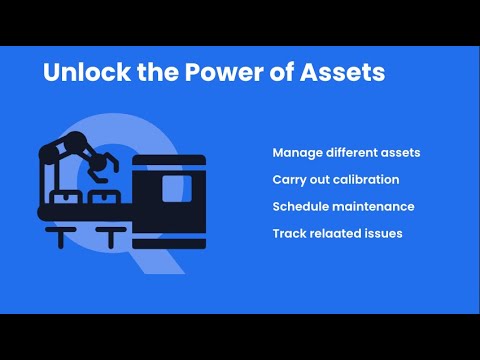
The Asset Hub in Q-Hub is designed to give you a structured, repeatable and scalable way to manage assets – from simple items like first aid boxes through to gauges, lifting equipment and complex machinery. It focuses on:
Getting your structure right first (profiles, groups, locations, statuses, tasks).
Using templates and Excel uploads so you can onboard assets in bulk.
Linking assets to calibration, maintenance and events (accidents, NCRs, etc.) across Q-Hub via the Asset field.
Rather than being “just a register”, Asset Hub is built to:
Standardise what data you capture for each type of asset.
Standardise what you do to those assets (management tasks and forms).
Make it easy to see what’s overdue, what’s coming up, and what’s happened to each asset over time.
Asset Hub structure at a glance
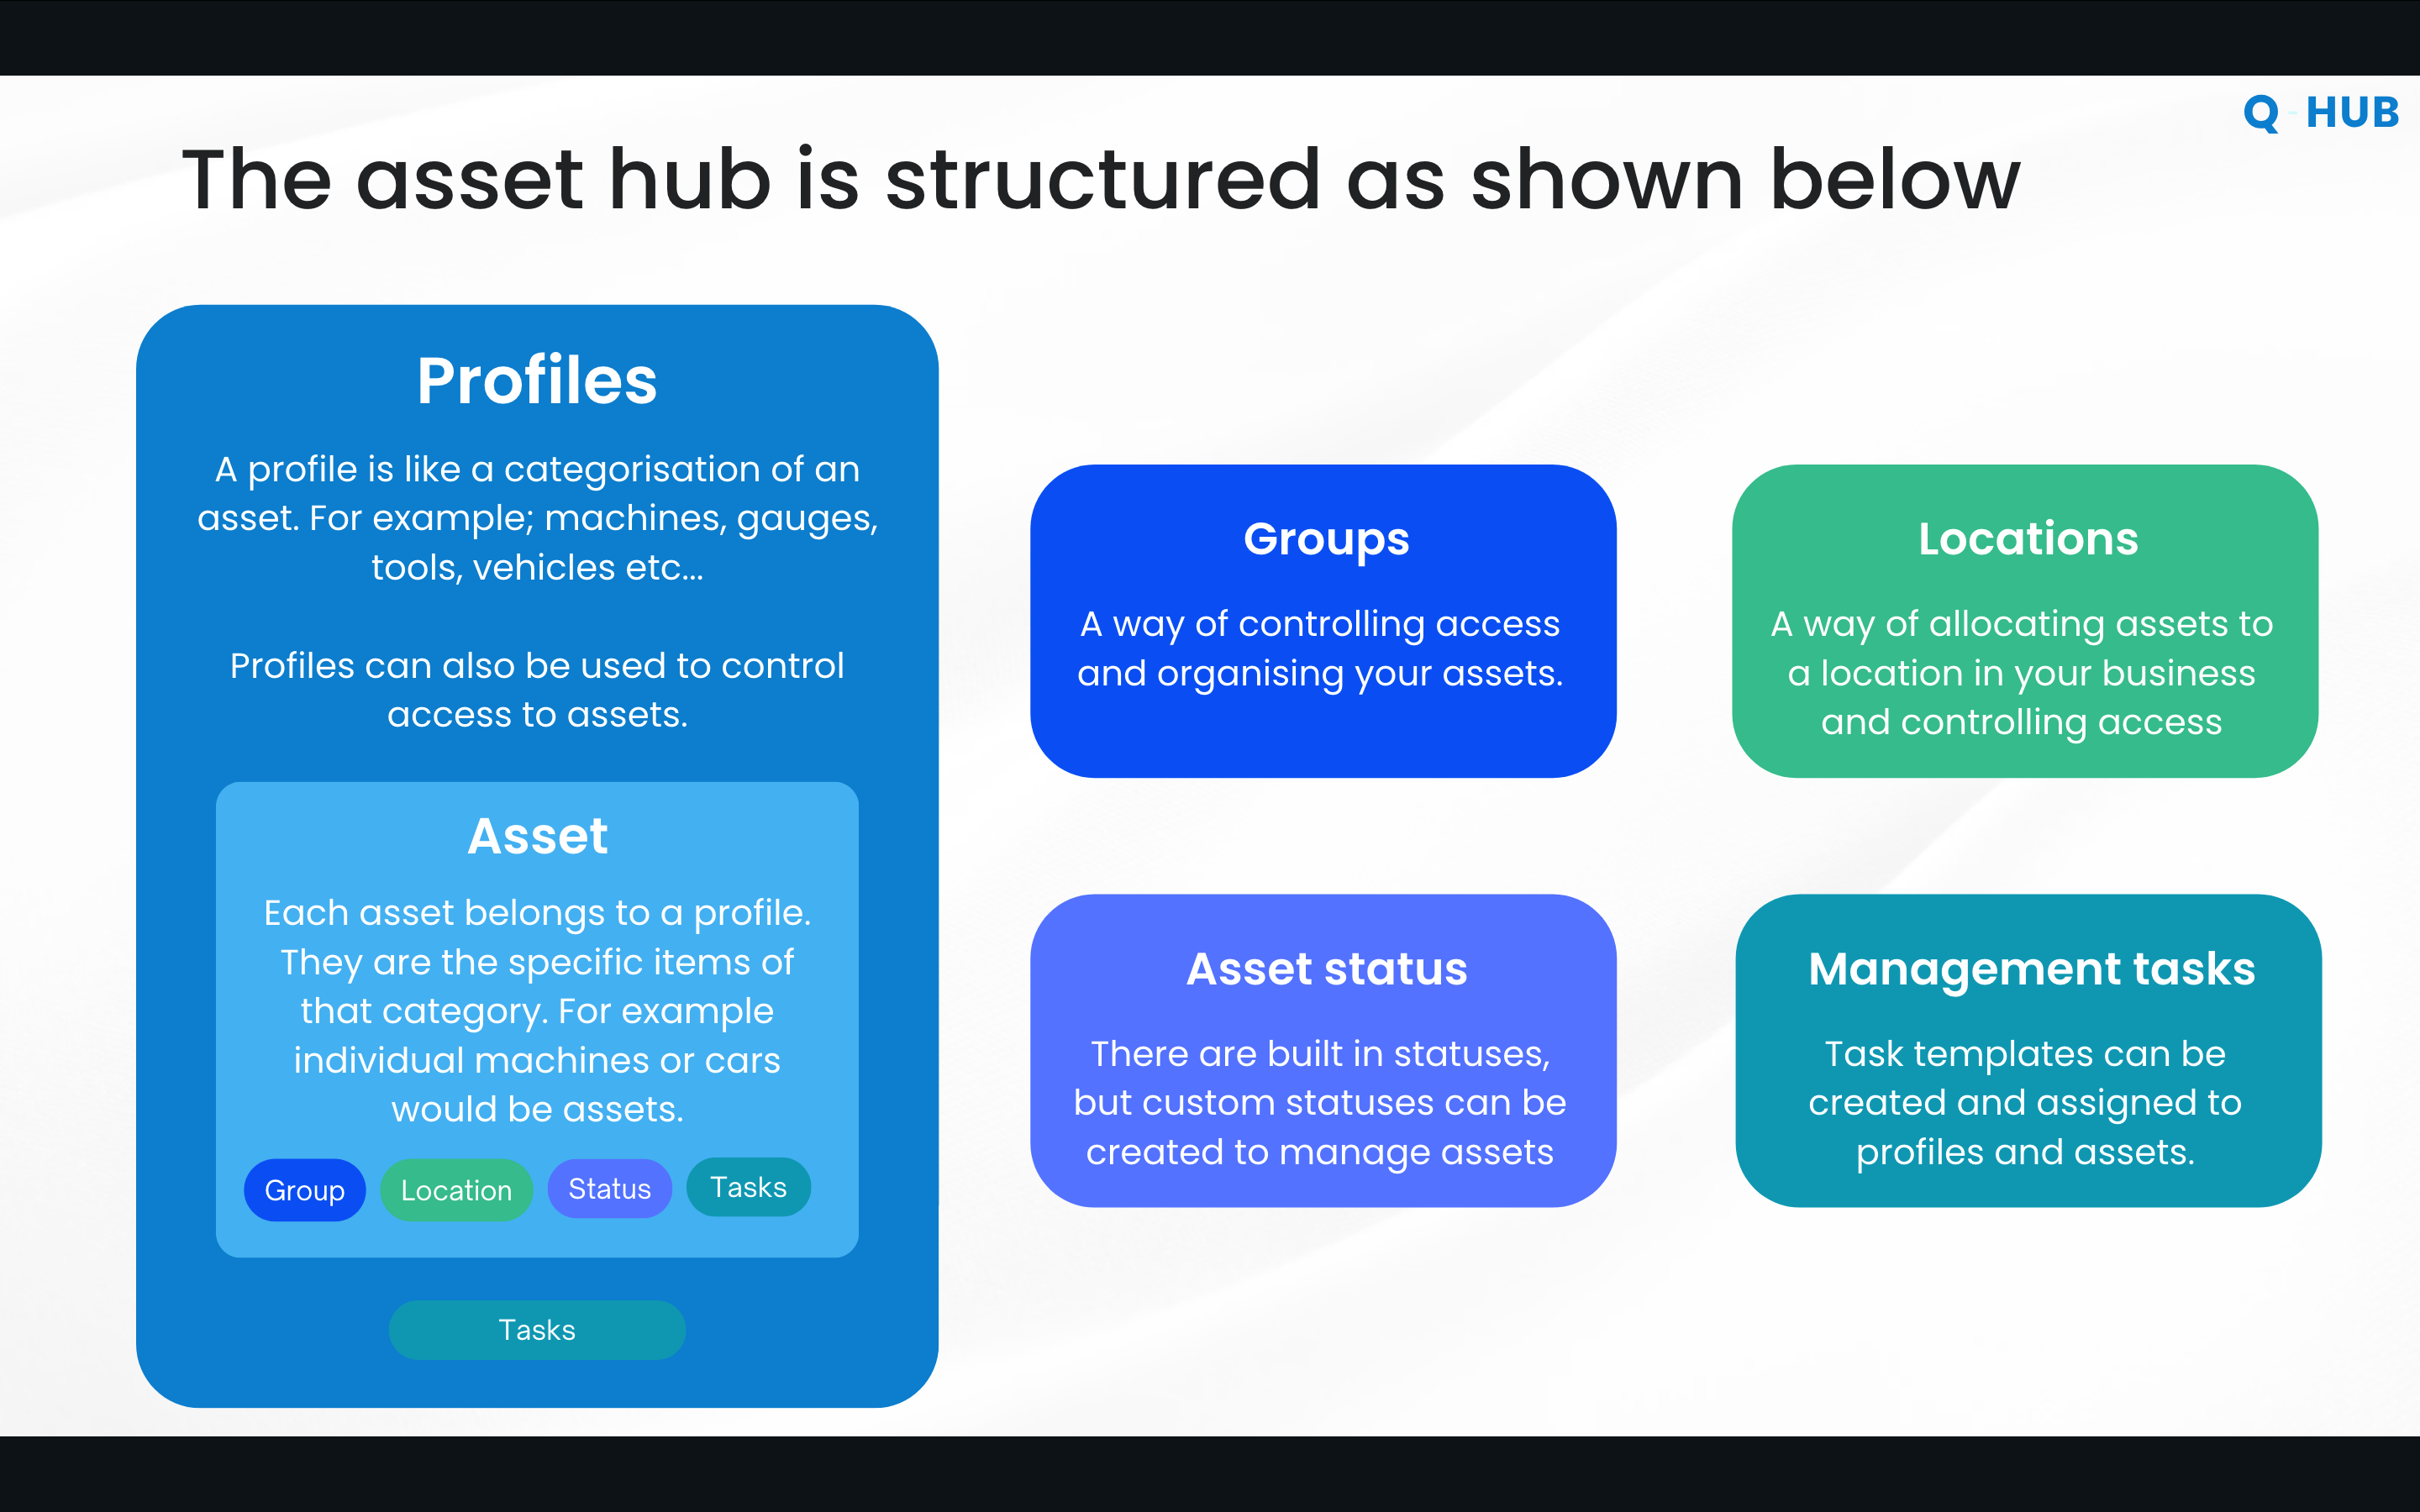
At a high level, each asset sits inside this structure:
Profile – what type of asset it is (e.g. gauges, vehicles, machinery, first aid boxes).
Group – who is generally responsible (e.g. Health & Safety, Engineering, Calibration team).
Location – where the asset lives (site → building → cabinet → drawer, if needed).
Status – what condition or state it’s in (OK, overdue, recall, quarantine, custom).
Management tasks – what needs to be done to it over time (checks, calibrations, maintenance).
Every single asset:
Belongs to one profile.
Has one group, one location, a status, and one or more management tasks assigned.
Uses this combination to drive visibility, workload and reporting.
Profiles – the backbone of your asset structure
A profile is how you categorise a type of asset and define:
What fields you capture for it.
What management tasks apply to assets of that type.
Examples:
Vehicles / Cars – you may want:
Registration number
Make / model
Weekly check task
MOT / inspection tasks
Gauges – similar but with different data fields and tasks, e.g.:
Plug gauge → record diameter, visual checks, maybe calibration.
Pressure gauge → record approved PSI/bar, calibration records, checks.
You can technically put different gauges in one profile and only apply certain tasks to some assets, but best practice is:
If the activities and data for two asset types are meaningfully different, create separate profiles.
Example:
Profile: Plug gauges– has diameter field, maybe no maintenance task.Profile: Pressure gauges– has approved pressure field, calibration task, etc.
This makes templates, uploads, tasks and reporting much cleaner.
Groups, Locations, Statuses and Tasks working together
Groups – extra classification layer (e.g. Health & Safety, Engineering, Calibration).
Used to filter and to control access (who sees which assets).
Locations – where the asset belongs, from high-level site to very granular storage points.
Can also be used to control who can see assets at that location.
Statuses – standard and custom options:
Built-in: OK, Overdue, Recall, Quarantine.
Custom: e.g. Out for calibration, Safe to use, Defective in use.
Management tasks – anything that needs doing on a schedule (checks, calibration, maintenance).
All of these link to each asset and are used both for organisation and access control.
How is the Asset Hub used?
The Asset Hub is used in two main phases:
Design and setup – get the structure, tasks and templates right.
Day-to-day operation – use profiles, tasks, views and dashboards to manage work
But how do you set it up…?
“Clean data in, clean system out”
The quality of your asset system depends on the quality and consistency of the data you load in.
Common starting points:
Some customers already have well-maintained spreadsheets with clear types and dates.
Others have tens of thousands of assets with incomplete or inconsistent data (missing due dates, mixed naming, etc.).
Asset Hub can handle both, but the setup process is smoother and faster when:
Asset lists are cleaned and validated first.
Dates and formats are consistent.
You know who owns which assets.
Recommended setup order
Best practice is to follow this order before importing assets:
Identify your profiles
Look at your existing spreadsheets or systems.
List categories like: water coolers, calibration equipment, plug gauges, fixtures, vehicles, etc.
These become your profiles in Asset Hub.
Decide activities per profile
For each profile, ask:What regular checks do we do? (e.g. monthly visual check)
What formal records do we keep? (e.g. annual calibration with certificate)
Do we need simple tasks or full forms?
Example, for gauges:
3-monthly quick check → simple task: confirm condition, maybe take a photo.
Annual calibration → form to capture calibration record, date and calibration body.
Create management tasks in Q-Hub
Build task templates and forms (e.g. “Annual Gauge Calibration”).
Configure recurrence (e.g. every 365 days).
Create profiles and assign tasks to profiles
In Asset Hub:Create the profiles you listed.
Attach the management tasks that should apply to assets in that profile.
This effectively creates the template for that asset type.
Download profile templates (Excel)
For each profile, download the profile template (spreadsheet).
The template already knows which fields and tasks are relevant for that profile.
Populate the Excel templates with your data
Paste or fill in data from your existing sources.
Make sure:
Fields are complete and consistent.
Asset owners are real users in Q-Hub (otherwise the owner defaults to whoever uploads).
Upload templates back into Asset Hub
Upload one profile at a time.
Q-Hub creates all assets with their groups, locations, statuses and tasks as per the template.
Verify and tweak
Spot check some assets.
Adjust tasks, statuses or owners as needed.
Once happy, run live.
Asset Hub homepage
The Asset Hub homepage gives you a quick overview of:
Task performance on your assets (how well you are keeping up).
The status of your assets (OK, overdue, etc.).
Planned tasks that are coming up.
This is your starting point for understanding overall workload and health of your assets.
Profiles page and profile-level reporting
On the Profiles page you can:
See a list of all profiles (e.g. gauges, machinery).
Click into a profile to view:
Assets list for that profile.
Task tracker – all planned tasks within the next 90 days for those assets.
Profile KPIs – similar to the homepage but specific to that asset type.
Asset schedule – when tasks are due across the assets in that profile.
This helps you dig deeper into one type of asset at a time.
Asset detail page: statuses and management tasks
On an individual asset, you see:
Profile picture (if set).
Overall asset status – is the asset OK or not in general?
Management status – are any management tasks overdue?
Booking status – can someone scan the QR code and book this asset out to themselves?
These 3 statuses are deliberately separate:
Overall asset status – e.g. you may want a machine to show Overdue if a critical annual inspection is late.
Management status – flags that some task is overdue (even if the asset is still safe to use).
Booking status – reflects availability for booking (regardless of maintenance).
This allows you to handle real-world nuances, e.g.:
A CNC machine where an overdue annual inspection should mark the whole asset as not OK.
A monthly coolant check that you still want to track, but that doesn’t immediately make the machine unsafe.
On the Management tasks section of the asset you can see:
All tasks assigned to that asset (e.g. “Maintenance check”, “Annual calibration”).
For each scheduled task:
Frequency (e.g. every 365 days).
How many have been sent vs completed.
A list of past events with links to forms and certificates.
Asset Work: full history of “mentions”
The Asset Work tab gives you a combined history of:
Management tasks (maintenance, calibration).
Forms where the asset was selected via the Asset field:
Accidents / near misses.
Non-conformances (NCRs).
Other forms you design.
For example, on a JCB digger you might see:
The scheduled maintenance tasks (some completed, some overdue).
A calibration record.
An accident/near-miss form where someone indicated that this specific JCB was involved.
This turns Asset Work into a single place to see everything that has happened to or involved that asset.
The Asset field and linking across Q-Hub
The Asset field is a special field type in Q-Hub forms and tasks which lets you:
Search for and select an asset from the Asset Hub.
Automatically link the form entry or task to that asset.
(From the form) quickly jump to the asset or update its status.
Examples:
Calibration form
Calibration task is linked to an asset via the Asset field.
The completed form shows in the Asset Work tab.
You can view the calibration certificate and update asset status as part of the task.
Accident / Near Miss form
Question: “Was any equipment involved in the accident?” (Yes/No).
If Yes, show the Asset field so the person can pick the asset.
Non-conformance (NCR) form
In root cause or corrective actions, add: “Was any asset involved?”
If Yes, show the Asset field.
On the web app:
Answering “Yes” opens the Asset field search.
On mobile, the same pattern works, and a future enhancement is planned to allow QR code scanning directly from the Asset field, plus longer-term support for RFID links.
Asset tables, filters, views and dashboard shortcuts
On the Assets page you can:
Switch between tile view and table view.
Download all assets, or download an edit template to bulk-change values (e.g. owners) and re-upload.
In table view:
Columns include profile, groups, locations, status, owner, etc.
You can:
Filter by location (e.g. Bristol).
Hide columns you don’t need (e.g. asset field, if not required in that view).
Filter by status (e.g. only show Overdue).
Once you’ve set filters and columns:
Save the view with a name (e.g. Overdue – Bristol).
Mark it as public so others can use it.
Star it to make it your default when you open Asset Hub.
You can then add dashboard shortcuts in Q-Hub workspaces:
Edit a workspace (e.g. Quality & Engineering).
Add a shortcut tile pointing directly to a saved Asset Hub view (e.g. Overdue Bristol assets).
Anyone with access to that workspace and view can click once to open the filtered assets and start working.
Use cases
Use case 1 – Calibration and scheduled maintenance of gauges
Scenario:
You manage a large number of gauges (plug, pressure, other types) and need:
Regular visual checks.
Formal annual calibration with certificates.
How Asset Hub supports this:
Create profiles such as Plug Gauges and Pressure Gauges.
For each profile:
Define relevant data fields (diameter vs approved pressure).
Attach:
A visual check task (e.g. every 3 months).
An annual calibration form-based task (e.g. every 365 days).
Use the profile task tracker and asset schedule to see upcoming work.
Store each calibration’s form, result and certificate against the asset.
Use case 2 – Department-based responsibility (groups)
Scenario:
Different departments own different assets:
Health & Safety – first aid boxes, lifting equipment.
Engineering – machines, gauges, tooling.
How Asset Hub supports this:
Create a Health & Safety group and an Engineering group.
Assign profiles/assets to the correct group.
Use group settings and access controls so:
H&S users see and manage H&S assets.
Engineering users see and manage engineering assets.
Combine groups with locations so users only see assets they are actually responsible for.
Use case 3 – Linking accidents / NCRs to assets
Scenario:
You want to understand when assets are involved in accidents or non-conformances.
How Asset Hub supports this:
Add the Asset field to:
Accident / Near Miss forms.
NCR forms (e.g. customer non-conformance).
Use hide-show logic:
“Was any equipment involved?” → Yes → show Asset field.
Whenever the form is submitted:
The selected asset is linked.
The event shows in the Asset Work tab for that asset.
Over time, this gives you traceability: which assets are frequently associated with issues.
Use case 4 – Site-specific overdue views and dashboards
Scenario:
You have multiple sites and want each site team to focus on their own overdue assets.
How Asset Hub supports this:
Use the assets table to:
Filter Location = Bristol.
Filter Status = Overdue.
Save the view as Overdue – Bristol and make it public.
Add a workspace shortcut on the local team’s dashboard called Overdue Bristol assets.
Team members click once and see exactly what needs attention at their site, with due dates and tasks.
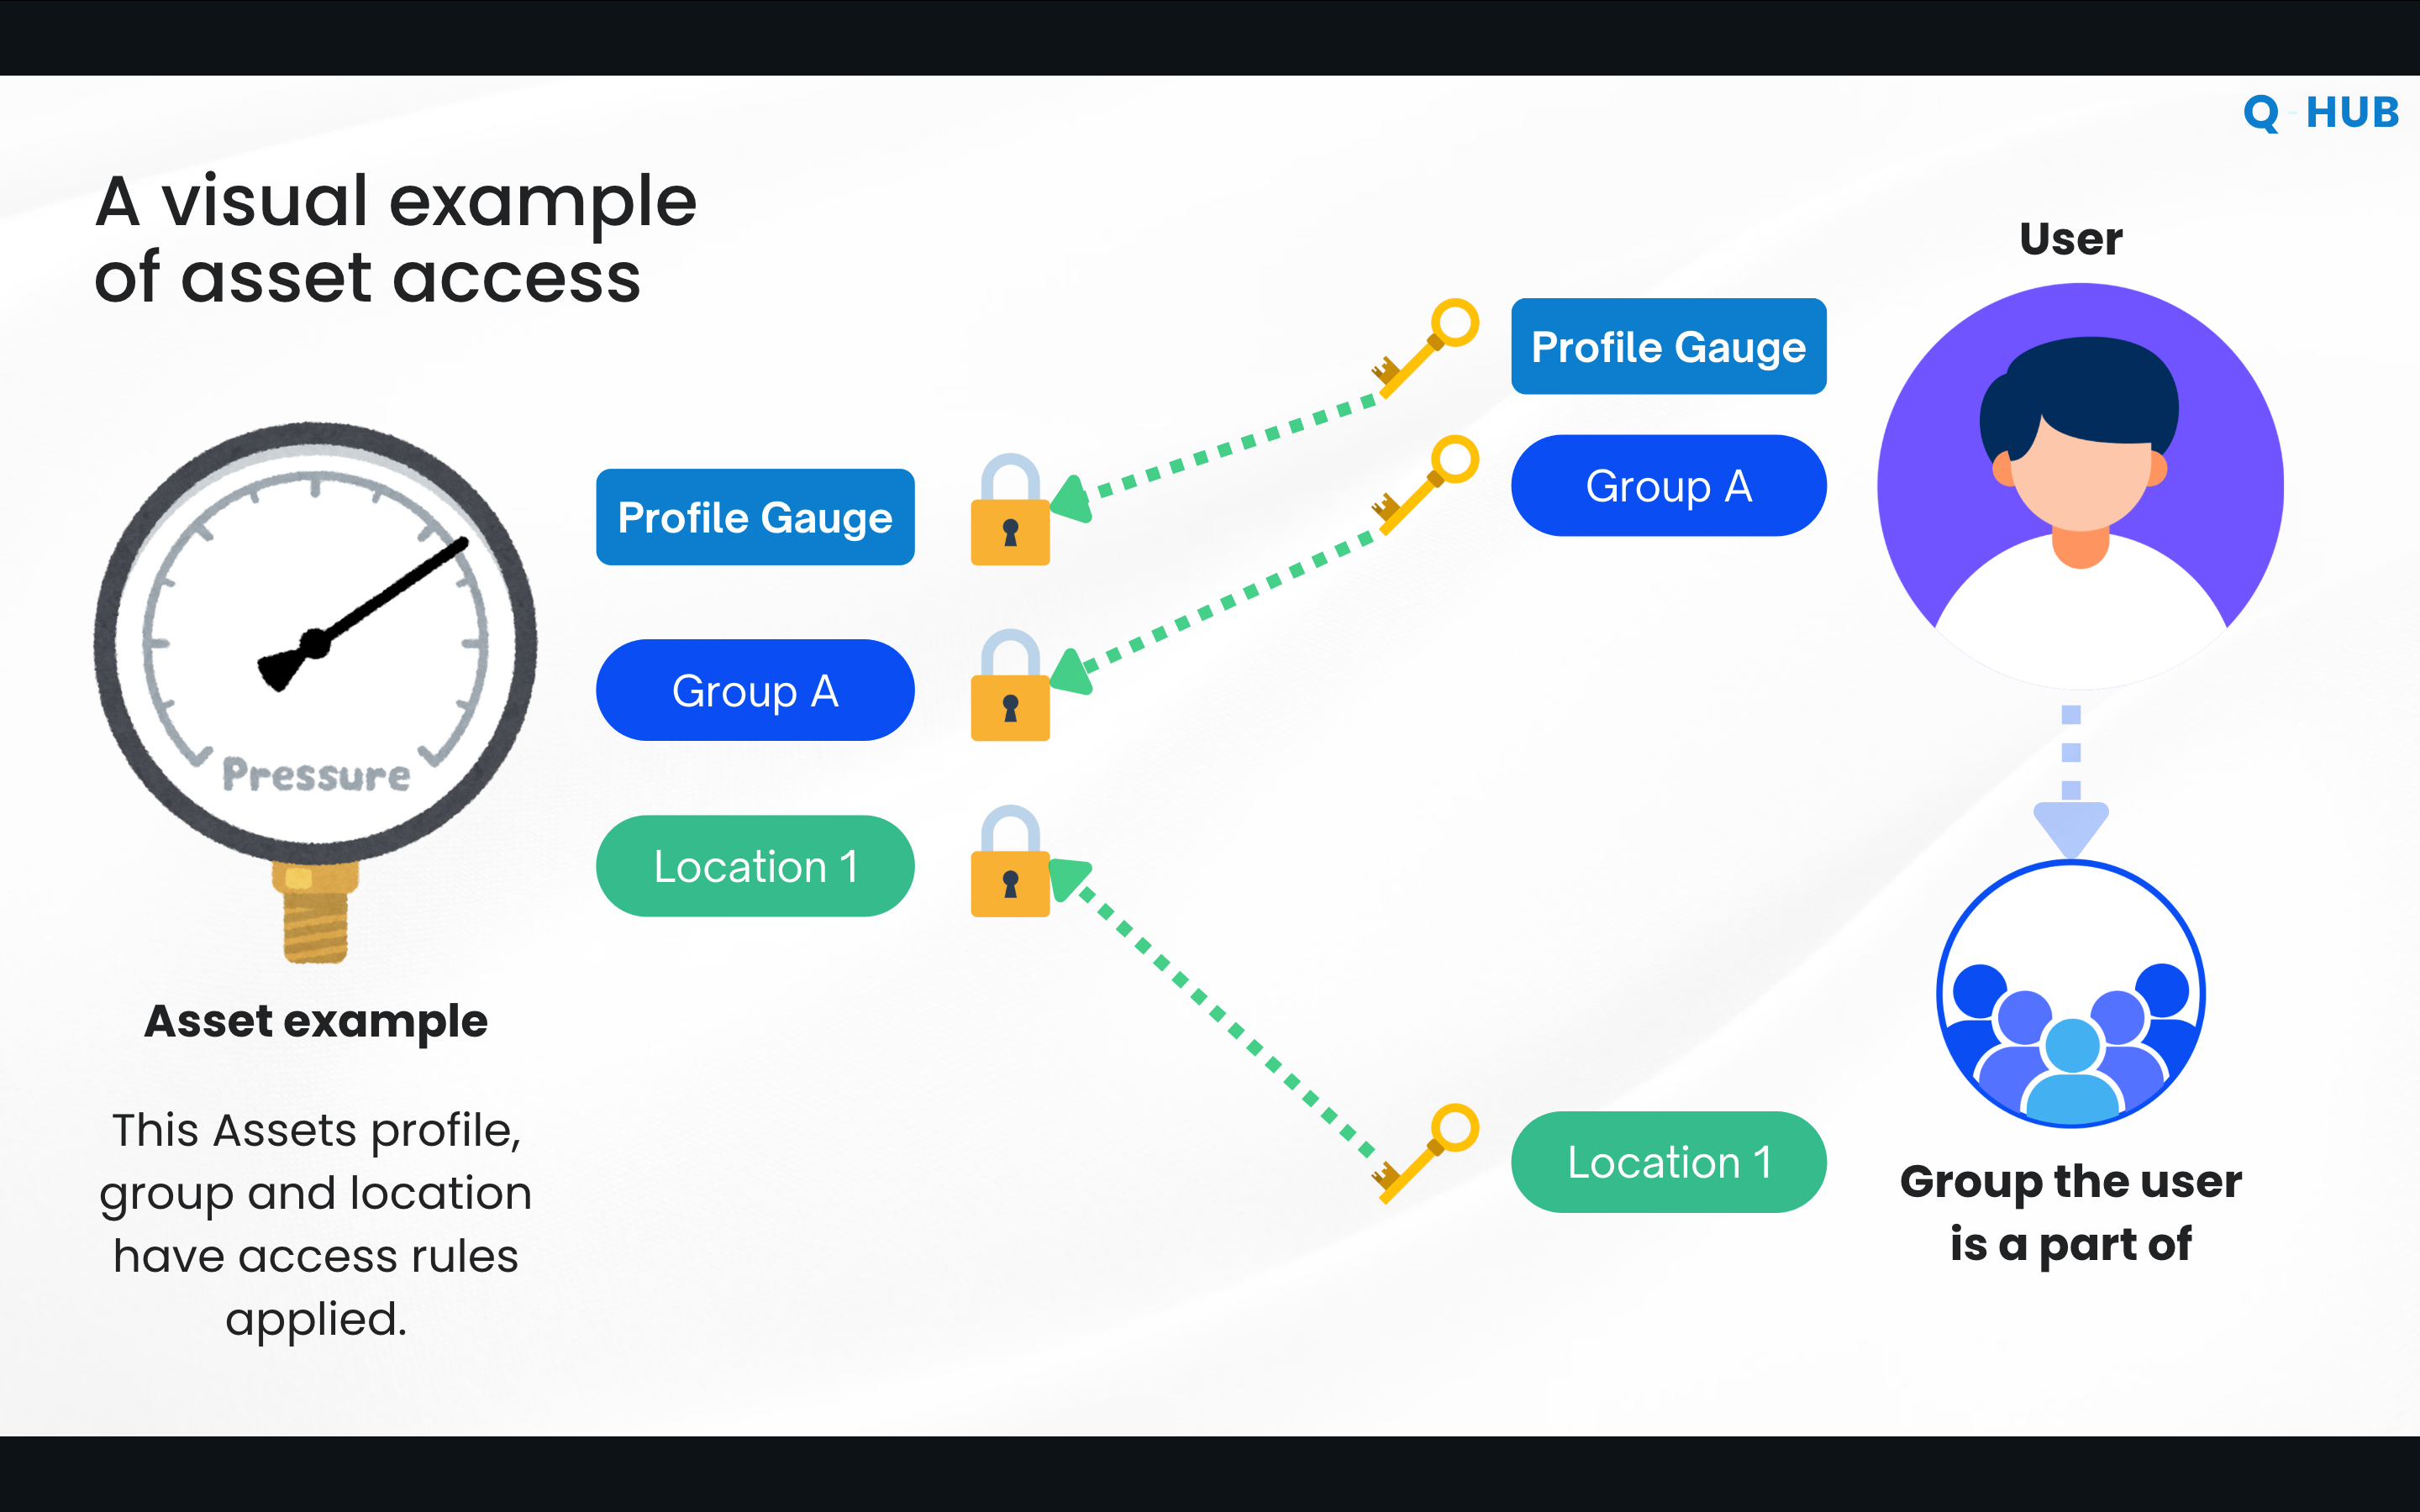
Access controls and visibility
Asset visibility is controlled by a combination of:
Profile access
e.g. profile Gauges only viewable by the engineering team.
Group access
e.g. Group A only accessible to calibration engineers.
Location access
e.g. Location 1 only accessible to certain site users.
A user will only see an asset if:
They are allowed to see the profile,
They are allowed to see the group, and
They are assigned to the location that the asset is in.
If any of these checks fails, the asset is hidden from that user.
This lets you:
Avoid overwhelming users with assets they don’t need.
Ensure only relevant sites/departments see their own assets.
Easily move users between sites – when you change their location assignment, they start seeing assets for the new site instead.
Best Practices
Design profiles around activities, not just names
If two assets require different checks or calibrations, give them different profiles even if they sound similar.
Example: separate profiles for plug gauges and pressure gauges.
Decide tasks before uploading assets
Work out all regular management tasks and forms per profile first.
Then build profiles and assign tasks, and only then import assets.
Clean your data first
Standardise names, locations and date formats in your spreadsheet.
Confirm that asset owners exist as users in Q-Hub.
This avoids messy imports and rework.
Use groups and locations for clear responsibility
Group assets by department (H&S, Engineering, Calibration).
Assign users to the right locations so they only see relevant assets.
Use status separation wisely
Reserve overall asset status changes for things that truly affect safe use.
Use management status to show task backlog without unnecessarily blocking use.
Use the Asset field everywhere it makes sense
Add it to accident, NCR and other forms where equipment may be involved.
This builds up a strong history of usage and issues in the Asset Work tab.
Create saved views for your common questions
Examples: “Overdue – Bristol”, “Due this month – Lifting Equipment”, etc.
Add shortcuts to dashboards so teams can get there in one click.
Tackle setup in phases for very large asset sets
If you have tens of thousands of assets, consider bringing them in profile by profile or site by site.
This matches how Q-Hub supports onboarding and reduces friction.
Troubleshooting
Issue: “I can’t see an asset I know exists.”
Possible causes:
You don’t have access to the asset’s profile.
You don’t belong to the asset’s group.
You are not included in the asset’s location access.
Solutions:
Check with your admin which profiles, groups and locations you’re assigned to.
Confirm that the asset is indeed in a profile/group/location you should see.
Ask an admin to adjust your access or move the asset if necessary.
Issue: “All my new assets are assigned to the wrong owner.”
Possible causes:
In the import template, you set an asset owner name or email that doesn’t match a user in Q-Hub.
The system defaulted the owner to the person who uploaded the template.
Solutions:
Ensure all asset owners are added as users before importing.
Correct owner details in your spreadsheet and re-upload using the edit template.
Issue: “Asset shows ‘Management overdue’ but asset is still safe to use.”
Possible causes:
A scheduled management task (e.g. best-practice monthly check) is overdue.
Overall asset status hasn’t been updated to reflect that it remains OK to use.
Solutions:
Review the tasks on the asset and decide which ones should truly affect overall status.
Keep Management status as the indicator of backlog.
Only change overall asset status for safety-critical missed tasks (e.g. annual inspection).
Issue: “My import is messy or not giving me what I expected.”
Possible causes:
Profiles and tasks weren’t fully thought through before importing.
Data in the spreadsheet is inconsistent (locations, dates, owners).
Solutions:
Re-check your profile list and management tasks per profile.
Clean and standardise your spreadsheet:
Consistent profile names.
Valid location names.
Dates in the correct format.
Re-download the profile template and paste cleaned data into it before re-uploading.
Issue: “I can’t see accident or NCR records on the asset.”
Possible causes:
The relevant forms don’t include the Asset field.
The field is present but was not completed on those records.
Solutions:
Edit the form design to include the Asset field (with hide-show logic if appropriate).
Train users to select the asset when the question is relevant.
New submissions will then appear under Asset Work for the chosen asset.
Frequently Asked Questions
Q: What’s the difference between a profile and a group?
A profile describes the type of asset (e.g. gauges, vehicles, machinery) and controls what fields and management tasks apply.
A group is used mainly for responsibility and filtering (e.g. Health & Safety, Engineering) and can drive who sees which assets.
Q: Do I have to set up tasks and profiles before uploading assets?
A: It’s strongly recommended. Asset Hub is designed so that profiles and management tasks form a template. If you define these first and then import assets via the profile templates, you get a much cleaner setup and avoid rework.
Q: What is the Asset Work tab for?
A: Asset Work shows everything that mentions the asset across Q-Hub: scheduled management tasks (calibration, maintenance) and forms where the asset was chosen via the Asset field (accidents, NCRs, etc.). It gives you a single history of that asset.
Q: Can Asset Hub handle large numbers of assets?
A: Yes. Some customers bring in tens of thousands of assets via the Excel profile templates. There may be more setup effort when data is messy or incomplete, but the structure (profiles, groups, locations, tasks) is designed to cope with large sets once the data is cleaned.
Q: How does Asset Hub help with calibration certificates?
A: Calibration is handled as a management task. Each calibration task uses a form where you can record calibration details and upload the certificate. Completed calibrations are then visible on the asset’s management tasks and in the Asset Work tab, along with who did it and when.
Q: What is the Asset expiry feature?
A: The Asset expiry feature is for assets that have a fixed life span. So if you add the expiry date to the asset, from that date on it will mark the asset status as expired and automatically trigger a recall if it has been booked out by people.
Examples may be things like; paint, chemicals, thermocouples.
Explore the Q-Hub platform
Ready to try it? Get started